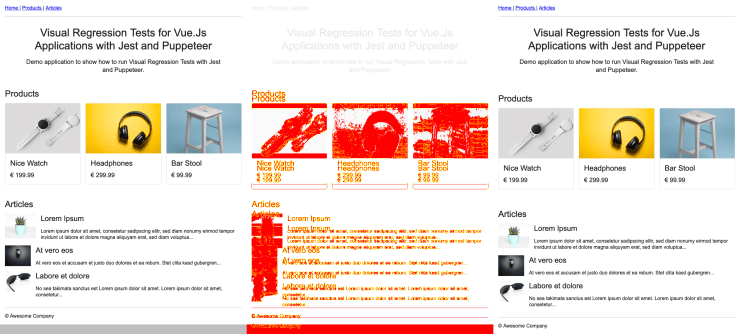
Visual Regression Tests for Vue.Js Applications with Jest and Puppeteer
Note: This is the seventh part of my “Advanced Vue.js Application Architecture” series on how to structure and test large scale Vue.js applications. Stay tuned, there’s more to come! Follow me on Twitter if you don’t want to miss the next article.
<< First < Previous
Assuming that we already have integration tests and unit tests in place, it’s time to take a look at how we can build our next line of defense against unwanted regressions in our app. In this article, we’ll use Jest and Puppeteer to set up Visual Regression Tests to test wether each part of our Vue.js application still looks as intended after making some (possibly unexpected) far-reaching changes.
This article builds upon my previous article about integration testing with Jest and Puppeteer. If you want to follow along you can check out the repository of the previous article. Additionally, you can find the full code covered in this article on GitHub and you can also take a look on the demo application running on Netlify.
The setup
Let’s start with setting up everything we need in order to run Visual Regression Tests. All of the following code examples assume that you already have a basic test setup, as described in my article about integration testing, up and running.
npm install jest-image-snapshot --save-devAfter installing the jest-image-snapshot dependency we can integrate it into our test setup.
 const { defaults } = require('jest-config');

-const puppeteerModes = ['acceptance', 'integration'];
+const puppeteerModes = ['acceptance', 'integration', 'visual'];
 const { TEST_MODE } = process.env;
 const PUPPETEER_MODE = puppeteerModes.includes(TEST_MODE);

+const testMatchers = {
+  integration: ['**/?(*.)+(integration).[tj]s?(x)'],
+  visual: ['**/?(*.)+(visual).[tj]s?(x)'],
+};

 module.exports = {
   moduleFileExtensions: [
     'js',
     'jsx',
     'json',
     'vue',
   ],
   preset: PUPPETEER_MODE ? 'jest-puppeteer' : defaults.preset,
   setupTestFrameworkScriptFile: '<rootDir>/test/setup/after-env.js',
   snapshotSerializers: [
     'jest-serializer-vue',
   ],
-  testMatch: TEST_MODE === 'integration' ? [
-    '**/?(*.)+(integration).[tj]s?(x)',
-  ] : defaults.testMatch,
+  testMatch: testMatchers[TEST_MODE] || defaults.testMatch,
   testURL: 'http://localhost:8080',
   transform: {
     '^.+\\.vue$': 'vue-jest',
     '.+\\.(css|styl|less|sass|scss|svg|png|jpg|ttf|woff|woff2)$': 'jest-transform-stub',
     '^.+\\.jsx?$': 'babel-jest',
   },
 };
Here you can see the changes in our jest.config.js file. We add a new matcher which is activated in visual mode for only handling files ending with .visual.js.
     "test:acceptance": "TEST_MODE=acceptance vue-cli-service test:unit -- test/**/*",
     "test:integration": "TEST_MODE=integration vue-cli-service test:unit -- src/**/*"
     "test:integration": "TEST_MODE=integration vue-cli-service test:unit -- src/**/*",
+    "test:visual": "TEST_MODE=visual vue-cli-service test:unit -- test/**/*"
   },
   "dependencies": {
     "@vue/cli-plugin-babel": "^3.5.1",
In our package.json file we add a new npm script test:visual which is a shortcut for starting our visual integration tests by running npm run test:visual.
-const puppeteerModes = ['acceptance', 'integration'];
+const puppeteerModes = ['acceptance', 'integration', 'visual'];
 const { TEST_MODE } = process.env;
 const PUPPETEER_MODE = puppeteerModes.includes(TEST_MODE);
We also have to update the code regarding the PUPPETEER_MODE detection in our test/setup/after-env.js file. This could be refactored so we only have to maintain this logic in one place, but I leave this as an exercise for you.
+import { toMatchImageSnapshot } from 'jest-image-snapshot';
 import Vue from 'vue';

 const SERVE_MODE = !global.describe;
 const TEST_MODE = !SERVE_MODE && process.env.TEST_MODE;

+if (TEST_MODE === 'visual') {
+  expect.extend({ toMatchImageSnapshot });
+}

 export const setup = SERVE_MODE ? cb => cb() : () => {};

 export const mount = (asyncComponent, options = {}) => {
In our test/utils.js file we have to make two changes. Above you can see the new code for activating the toMatchImageSnapshot expect extension.
   return matches.length > 0;
 };

-export const open = url => page.goto(`http://localhost:8080${url}`);
+export const open = url => page.goto(`http://localhost:8080${url}`, { waitUntil: 'networkidle0' });
Additionally to activating the expect extension we also have to make Puppeteer wait until the network is idle to make sure that everything is ready for screenshotting.
 Thumbs.db

 # Folders to ignore
+__diff_output__
 /dist
 node_modules
 /test/screenshots/
Last but not least you can see that we’ve added the __diff_output__ directory, which is used to store screenshots of diffs if a test fails, to our .gitignore file because we usually don’t want to add those images to our repository.
Writing a Visual Regression Test
Now that everything is set up correctly we can write our first Visual Regression Test.
// test/features/homepage.visual.js
import { open } from "../utils";

describe("Homepage", () => {
  test("It should render correctly.", async () => {
    await open("/");
    const image = await page.screenshot({ fullPage: true });

    expect(image).toMatchImageSnapshot();
  });
});
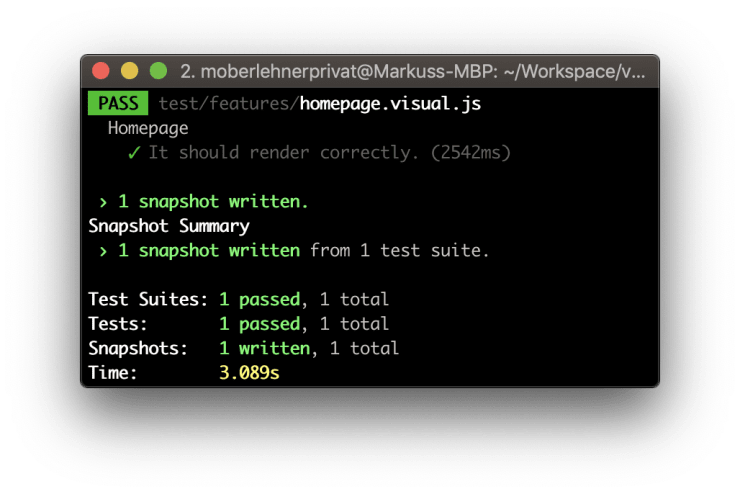
Above you can see that we first have to create a screenshot before we can use toMatchImageSnapshot to check if the newly created screenshot matches the reference screenshot taken earlier. If the test is run for the first time, the fresh screenshot is saved as reference image, this means the first test run always succeeds.
Do you want to learn more about testing Vue.js applications?
Register for the Newsletter of my upcoming book: Advanced Vue.js Application Architecture.
The testing process
Before we can check if a Visual Regression has happened, we have to create a reference image. Reference images are created automatically for us as soon as we run the test command the first time. The generated images should be checked in into version control.
npm run serve
# In a new Terminal window
npm run test:visualNow, as soon as you make some changes, you can run the Visual Regression Tests again to see if your changes have unintended side effects. Otherwise, if there are changes but they are all intended changes, you can delete the old reference image so a new one is created automatically for you as soon as you run the tests again. But don’t delete a reference image before you’re absolutely sure that all the detected differences are actually intended.
Wrapping it up
Visual Regression tests can be a great way of detecting unexpected Visual Regressions. But they also take quite long to execute. The longer your test suite runs the less useful it is. Keep that in mind when implementing Visual Regression Tests.
Follow-up
If you have troubles with failing tests due to rendering inconsistencies between different operating systems, you can read my article about how to run Visual Integration Tests with Docker.

