Integration Testing Vue.js Components With Jest and Puppeteer
Note: This is the sixth part of my “Advanced Vue.js Application Architecture” series on how to structure and test large scale Vue.js applications. Stay tuned, there’s more to come! Follow me on Twitter if you don’t want to miss the next article.
<< First < Previous Next >
This is a followup article of my previous article about Integration Testing Vue.js applications with Cypress. In this article, we test the same application but, instead of using Cypress, we want to use the combined forces of Jest and Puppeteer. I won’t go into much detail about the application itself or the separation of Integration Tests and Acceptance Tests, if you’re interested in that, please also read the previous article. In this article we take a closer look at the technical aspect of how we can utilize Jest and Puppeteer to write Integration and Acceptance Tests for a Vue.js application.
Table of Contents
Setup
Let’s begin by installing all the necessary npm packages. I’m assuming that you already have a Vue CLI 3 setup with Jest Unit Testing up and running; otherwise you also have to set up Jest.
npm install jest-puppeteer puppeteer --save-devNext up, we have to update our Jest configuration file to make it possible to switch between Unit-, Acceptance- and Integration Testing modes.
// jest.config.js
const { defaults } = require("jest-config");

const puppeteerModes = ["acceptance", "integration"];
const { TEST_MODE } = process.env;
const PUPPETEER_MODE = puppeteerModes.includes(TEST_MODE);

module.exports = {
  moduleFileExtensions: ["js", "jsx", "json", "vue"],
  preset: PUPPETEER_MODE ? "jest-puppeteer" : defaults.preset,
  setupTestFrameworkScriptFile: "<rootDir>/test/setup/after-env.js",
  snapshotSerializers: ["jest-serializer-vue"],
  testMatch:
    TEST_MODE === "integration"
      ? ["**/?(*.)+(integration).[tj]s?(x)"]
      : defaults.testMatch,
  testURL: "http://localhost:8080",
  transform: {
    "^.+\\.vue$": "vue-jest",
    ".+\\.(css|styl|less|sass|scss|svg|png|jpg|ttf|woff|woff2)$":
      "jest-transform-stub",
    "^.+\\.jsx?$": "babel-jest",
  },
};
Above you can see that we use the jest-puppeteer preset if we run Jest in combination with Puppeteer. Also we change the testMatch pattern in case we want to run our Integration Tests with Jest. Otherwise the default values for those settings are used.
// jest-puppeteer.config.js
const DEBUG_MODE = process.argv.includes("--debug");

module.exports = {
  launch: DEBUG_MODE
    ? {
        headless: false,
        slowMo: 100,
      }
    : {},
};
Because we want to be able to deactivate the Puppeteer headless mode and to slow down the test execution in case something does not work as expected, we implement a DEBUG_MODE which we can control via a --debug CLI argument.
// vue.config.js
const glob = require("glob");

const componentNameFromSpec = (spec) =>
  spec
    .split("/")
    .reverse()[0]
    .replace(/\..*?\.js/, "");

let pages;

if (process.env.TEST_MODE === "integration") {
  const integrationSpecs = glob.sync("./src/**/*.integration.js");
  pages = integrationSpecs.reduce((prev, spec) => {
    const name = componentNameFromSpec(spec);
    prev[name] = { entry: spec };

    return prev;
  }, {});
}

module.exports = {
  lintOnSave: false,
  pages,
};
In the code snippet above you can see our modified vue.config.js file. We use glob to find all *.integration.js files in our src directory and in order to create a separate page for every such file. This is only done if the TEST_MODE environment variable indicates that we want to create a build for Integration Testing otherwise a regular build is created.
{
  "scripts": {
    "serve": "vue-cli-service serve",
    "serve-integration-tests": "TEST_MODE=integration vue-cli-service serve",
    "build": "vue-cli-service build",
    "lint": "vue-cli-service lint",
    "test:unit": "vue-cli-service test:unit",
    "test:acceptance": "TEST_MODE=acceptance vue-cli-service test:unit -- test/**/*",
    "test:integration": "TEST_MODE=integration vue-cli-service test:unit -- src/**/*"
  }
}
Above you can see the npm scripts in our package,json file which we can later use to run our tests.
Puppeteer helper functions
One of the downsides of using Puppeteer for writing Integration Tests is that there are a lot of convenience functions missing which tools like Cypress provide out of the box. For example we don’t want to manually wait for a selector being visible and we want to be able to easily check if some text is rendered or not. But we can add these functionalities relatively easily ourselves without too much effort.
Automatic waiting for selectors
Let’s take a look at how we can wrap the Puppeteer selector functions with our own implementation which waits for the given selector to be visible on the page.
export const find = async (selector) => {
  await page.waitForSelector(selector);
  return page.$(selector);
};

export const findAll = async (selector) => {
  await page.waitForSelector(selector);
  return page.$$(selector);
};
In the code snippet above you can see that we are using the waitForSelector() method provided by Puppeteer before searching for the specified selector in the DOM.
Check if a certain text exists
Next we want to implement a simple helper function to check if a certain text is rendered. We can use the very powerful XPath selectors to help us with that.
export const containsText = async (text, wrapperSelector) => {
  const textSelector = `//text()[contains(.,'${text}')]`;
  const wrapper = wrapperSelector ? await find(wrapperSelector) : page;

  await page.waitForXPath(textSelector);
  const matches = await wrapper.$x(textSelector);

  return matches.length > 0;
};
By default we search for the given text on the whole page but it is also possible to provide a wrapperSelector.
Writing tests
Now everything is set up and we can write our first integration test using Puppeteer and Jest.
import { findAll, mount, open, run, setup } from "../../test/utils";

setup(() => {
  const ArticleTeaserContainer = () => import("./ArticleTeaserContainer.vue");
  mount(ArticleTeaserContainer);
});

export default run(({ url = "ArticleTeaserContainer" }) => {
  describe("Article teaser", () => {
    const component = '[data-qa="article teaser"]';
    // We wrap the `findAll()` function as a shortcut
    // to always search for the given selector inside
    // of the component under test.
    const findAllInComponent = (selector) =>
      findAll(`${component} ${selector}`);

    test("It should render three articles.", async () => {
      await open(url);

      const articles = await findAllInComponent('[data-qa="article"]');

      expect(articles.length).toBe(3);
    });
  });
});
Here you can see how we can write Acceptance Tests using Puppeteer in combination with Jest. We import a findAll() helper function from our utils file. This helper function automatically waits until the given selector is visible.
We can run our tests by executing the following two commands.
npm run serve-integration-tests
# In a new Terminal window
npm run test:integration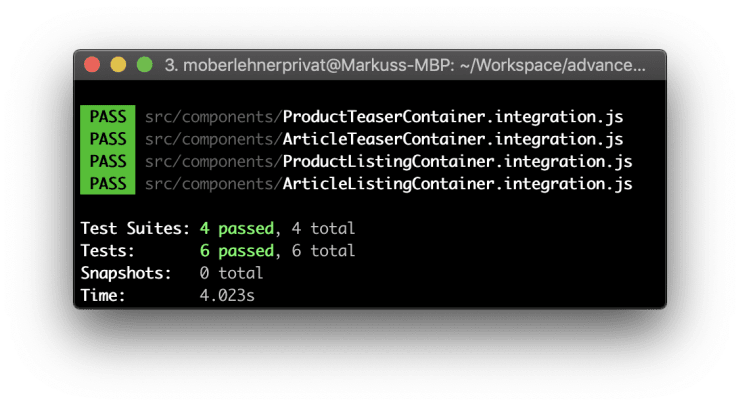
Jest Integration Test results
Because this is only a follow up article of my previous article about Integration Testing I won’t go into much detail about the overall principles of this approach. I highly recommend you to read my previous article if you want to learn more about this.
Do you want to learn more about testing Vue.js applications?
Register for the Newsletter of my upcoming book: Advanced Vue.js Application Architecture.
Pros and cons compared to Cypress
There are two major drawbacks to using Puppeteer and Jest over Cypress: it doesn’t offer certain important features out of the box, and it lacks the UI mode of Cypress, which comes in handy when practicing TDD.
On the other hand Puppeteer and Jest are much faster. Running the same tests with Jest and Puppeteer takes half the time of running them with Cypress. Although Cypress is very powerful there are some things which feel half-baked like for example it is not possible to run Chromium in headless mode. Running tests in headless mode is only possible with running tests in the Electron browser which feels pretty weird to me. As I understand it, they have to use Electron to record videos, but I still don’t like this approach very much.
Another huge advantage is the possibility to use the same test runner (Jest) for Unit and Integration tests. This makes it much easier to switch between writing one or the other.
Wrapping it up
There are a lot of cool new tools out there for running Acceptance- and Integration Tests. Cypress and TestCafe being the most fancy ones as far as my personal opinion is concerned. But there is also something tempting about a rather simple custom solution such as the combination of Puppeteer and Jest.
I really like the simplicity of using the Puppeteer API. It is also very convenient to not have to switch between two different test runners for writing Unit and Integration Tests. On the other hand, especially for beginners, the UI mode of Cypress can make things a lot easier.