Would you like to buy me a ☕️ instead?
Today we’ll explore how we can use the native browser geolocation API and the Open Street Map API to handle location data in a Vue.js applications. In our example app the users can press a button to automatically enter their address data into a form by allowing the geolocation API to access their current location.
You can find a live demo of the application on Netlify and you can take a look at the code on GitHub.
Asking the user for their permission
Building a renderless location component
We use the renderless component pattern to build our location component. This makes it very easy to reuse the code across our application. I follow my own convention of naming all my renderless components with a Frame suffix. So we call the component LocationFrame.
// src/components/LocationFrame.js
import * as locationService from '../services/location';

export default {
  data() {
    return {
      address: {},
      error: null,
      // Make it possible to conditionally render
      // elements based on if the geolocation API
      // is availabel or not.
      geolocationSupported: 'geolocation' in navigator,
      loading: false,
    };
  },
  methods: {
    async fetchAddress() {
      try {
        this.setLoadingState();
        this.address = await locationService.currentAddress();
        // Reset the loading state after fetching the address.
        this.loading = false;
      } catch (error) {
        this.setErrorState(error);
      }
    },
    setErrorState(error) {
      this.error = error;
      this.loading = false;
    },
    setLoadingState() {
      this.error = null;
      this.loading = true;
    },
  },
  render() {
    return this.$scopedSlots.default({
      // Data
      address: this.address,
      error: this.error,
      geolocationSupported: this.geolocationSupported,
      loading: this.loading,
      // Methods
      fetchAddress: this.fetchAddress,
    });
  },
};
In the code block above, you can see that we’re using the currentAddress() method, provided by the location service package, to fetch the address of the current location of the user. In the next step, we take a look at how we can implement the currentAddress() and other location data related methods.
Reverse geocoding with Open Street Map
In order to get an address matching some coordinates, we need to use a technique called “reverse geocoding”. Open Street Map makes this very convenient by providing a simple endpoint to which we can send data and retrieve a JSON object containing all the information we need.
We could use the new fetch() browser API for querying the Open Street Map endpoint, but because we want maximum compatibility with a wide range of browsers, we use the axios package.
npm install axiosAfter installing axios, we can implement our location service module.
// src/services/location.js
import axios from 'axios';

const ENDPOINT = 'https://nominatim.openstreetmap.org/reverse';
const FORMAT = 'jsonv2';

export function currentCoordinates() {
  return new Promise((resolve, reject) => {
    navigator.geolocation.getCurrentPosition(
      ({ coords }) => resolve(coords),
      // Reject if the user doesn't
      // allow accessing their location.
      error => reject(error),
    );
  });
}

export async function addressByCoordinates({ latitude, longitude }) {
  const { data } = await axios.get(ENDPOINT, {
    params: {
      format: FORMAT,
      lat: latitude,
      lon: longitude,
    },
  });

  return data.address;
}

export async function currentAddress() {
  const coordinates = await currentCoordinates();

  return addressByCoordinates(coordinates);
}
Above, you can see that we’re using the navigator.geolocation browser API to retrieve the location of the user. The currentCoordinates() method returns an object containing the latitude and longitude coordinates of the current position of the user.
Next we can see the addressByCoordinates() method. The addressByCoordinates() method takes an object containing a latitude and longitude and sends it to the Open Street Map endpoint in order to retrieve an address by using reverse geocoding. With a little luck, the Open Street Map API returns a valid address object.
The currentAddress() method is a shortcut for first retrieving the current coordinates of the user and then reverse geocoding them with addressByCoordinates().
Do you want to learn more about advanced Vue.js techniques?
Register for the Newsletter of my upcoming book: Advanced Vue.js Application Architecture.
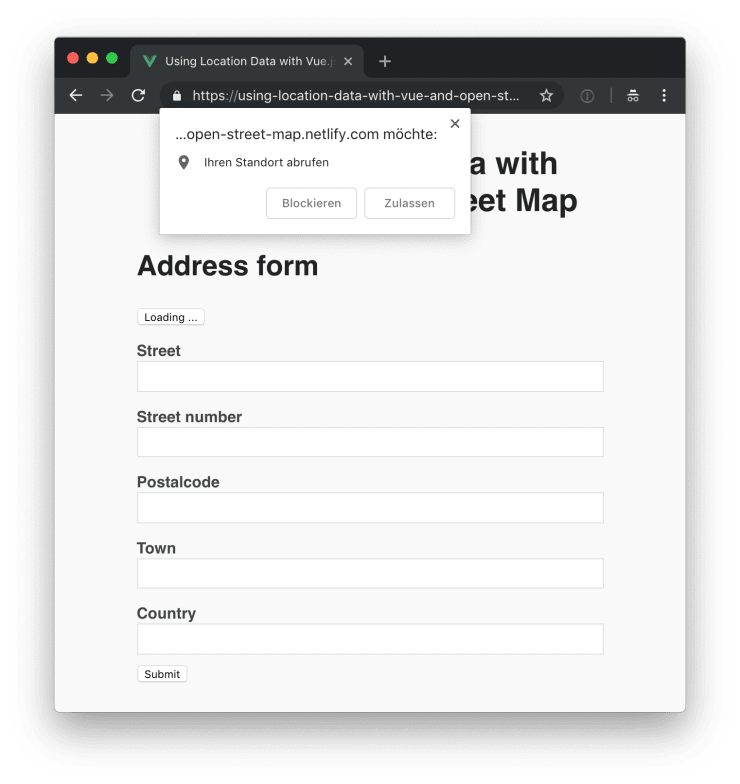
Autofilling a form with address data
Now that we’ve set everything up, we can use our newly created renderless LocationFrame component to auto fill a simple address form.
<template>
  <div class="App o-container o-container--s o-vertical-spacing o-vertical-spacing--xl">
    <h1>Using Location Data with Vue.js and Open Street Map</h1>

    <section class="App__example o-vertical-spacing o-vertical-spacing--l">
      <h2>Address form</h2>

      <location-frame>
        <form
          slot-scope="{
            address,
            error,
            fetchAddress,
            geolocationSupported,
            loading,
          }"
          class="o-vertical-spacing"
        >
          <button
            v-if="geolocationSupported"
            type="button"
            @click="fetchAddress"
          >
            {{ loading ? 'Loading ...' : 'Autofill my address' }}
          </button>

          <div
            v-if="error"
            class="error"
          >
            There was an error fetching your location, please try again.
          </div>

          <div class="App__form-item">
            <label for="street">Street</label>
            <input
              :value="address.road"
              name="street"
            >
          </div>

          <div class="App__form-item">
            <label for="street_number">Street number</label>
            <input
              :value="address.house_number"
              name="street_number"
            >
          </div>

          <div class="App__form-item">
            <label for="postalcode">Postalcode</label>
            <input
              :value="address.postcode"
              name="postalcode"
            >
          </div>

          <div class="App__form-item">
            <label for="town">Town</label>
            <input
              :value="address.village"
              name="town"
            >
          </div>

          <div class="App__form-item">
            <label for="country">Country</label>
            <input
              :value="address.country"
              name="country"
            >
          </div>

          <button>Submit</button>
        </form>
      </location-frame>
    </section>
  </div>
</template>

<script>
import LocationFrame from './components/LocationFrame';

export default {
  name: 'App',
  components: {
    LocationFrame,
  },
};
</script>
Above you can see the contents of the App.vue file in the src directory of the project. Inside of the <location-frame> element, you can see that the <form> element has access to all the properties provided by the LocationFrame component via the slot-scope property.
If geolocationSupported is true we render a button which calls the fetchAddress() method. After asking the user for their permission and successfully fetching the address, the address property is filled and the form field values are updated.
Wrapping it up
Once again the renderless component pattern proves to be very powerful. It helps us to build highly reusable components which can be used anywhere in your application.
Initially, I thought about using the Google Maps API instead of Open Street Map. I quickly changed my mind because I want to support the Open Street Map project. But because of the level of abstraction the renderless component pattern provides, you can quickly switch to using Google Maps if you find Open Street Map to be not powerful enough for your use case.