Integration Testing Vue.js Container Components With Cypress
Note: This is the fifth part of my “Advanced Vue.js Application Architecture” series on how to structure and test large scale Vue.js applications. Stay tuned, there’s more to come! Follow me on Twitter if you don’t want to miss the next article.
<< First < Previous Next >
In my previous article about Advanced Component Composition, we wrote Unit Tests for all of our Vue.js components except the Container Components. Writing Unit Tests for components with a lot of external dependencies (e.g. making API calls or accessing the $route object) is usually very hard to do because most of the time you have to mock a lot of their dependencies. There is nothing more annoying than writing complicated Vuex Store mocks to test a simple if condition.
Running Acceptance Tests with Cypress
Today we’ll take a look at how we can avoid Unit Tests but still be able to test our Container Components in a reasonable manner. The way we structured our components, the Container Components don’t have much logic that could be tested in a Unit Test anyhow. The job of our Container Components is to glue a bunch of components together and pass the initial data as properties to them. The best way to test the integration of multiple parts of an application and whether they interact properly is to write Integration Tests.
If you’re interested into diving deeper into the code featured in this article, you can check out the GitHub repository. Furthermore you can see a live demo of the application hosted on Netlify.
Unit Tests, Integration Tests and Acceptance Tests
We will use three testing strategies to test our application. The first level are Unit Tests, which test whether individual, isolated units of our application are doing their job correctly. We’ve already seen how to write Unit Tests in the previous article. Today we’ll take a closer look at the second and third level.
Integration Tests
After we have made sure by Unit Testing that our components do what they are supposed to do, we also want to make sure that those components that integrate multiple components also work correctly. There are multiple ways of how to do Integration Testing in Vue.js applications. One way is to use Jest and the Vue Test Utils similar to Unit Testing but instead of shallowMount() we can use mount() in order to mount the component with all its child components. Additionally we have to mock all external dependencies like calls to an API or the Router. This could be combined with Snapshot Testing.
Although this approach would be perfectly fine, I’ve decided to go a step further and use Cypress for Integration Testing too (instead of only using it for Acceptance Testing). This comes with the downside of being slower but the huge advantage that we don‘t have to mock all calls to external APIs, and we might be able to reuse the original Router and Vuex instances of our application for certain tests. Additionally, we run our tests in a real browser which gives us even more confidence that everything works correctly.
Cypress setup
The difference (at least the way we define it for our application) between Acceptance Tests and Integration Tests is that our Integration Tests run in isolation. We want to only test a single Container Component and not a whole page or the whole application at once. In order to do that, we need to have a slightly more complicated setup.
npm install cypress globLet’s begin by installing all the dependencies we need. We’ll later use glob to find all the *.integration.js files in our src directory and offcourse we need the cypress test runner package itself.
{
  "pluginsFile": "test/plugins/index.js"
}
Next we create a new cypress.json file in the root directory of our project. The only configuration option we add is for the pluginsFile because we want to use a .js configuration file and the only way to do this is to specify it in a Cypress plugin file.
// test/plugins/index.js
const customConfig = require("../cypress.config");

module.exports = (on, config) => Object.assign({}, config, customConfig);
Above you can see how we can use a Cypress plugin to extend the Cypress default config with our own configuration options from test/cypress.config.js.
// test/cypress.config.js
const mode = process.env.cypress_mode;

module.exports = {
  baseUrl: "http://localhost:8080",
  fixturesFolder: "test/fixtures",
  integrationFolder: mode === "integration" ? "src" : "test/features",
  screenshotsFolder: "test/screenshots",
  supportFile: "test/support/index.js",
  testFiles: mode === "integration" ? "**/*.integration.*" : "**/*.*",
  videosFolder: "test/videos",
};
As you can see above we check the cypress_mode env variable to see if the test runner was started in integration or acceptance mode. This is no Cypress feature but our own custom way of determining which tests to run: either Acceptance Tests located in test/features or Integration Tests directly located alongside their corresponding components in the src directory.
Vue.js setup
Because we want to test our Container Components in isolation we need to serve them as standalone components. Luckily Vue CLI 3 has a multi-page mode which we can use to serve each of our Container Components as a separate page.
// vue.config.js
const glob = require("glob");

const componentNameFromSpec = (spec) =>
  spec
    .split("/")
    .reverse()[0]
    .replace(/\..*?\.js/, "");

const integrationTestMode = process.argv.includes("--integration-tests");
let pages;

if (integrationTestMode) {
  const integrationSpecs = glob.sync("./src/**/*.integration.js");
  pages = integrationSpecs.reduce((prev, spec) => {
    const name = componentNameFromSpec(spec);
    prev[name] = { entry: spec };

    return prev;
  }, {});
}

module.exports = {
  pages,
  lintOnSave: false,
};
In the code snippet above you can see our modified vue.config.js file. We use glob to find all *.integration.js files in our src directory and create a separate page for every such file. This is only done if the --integration-test parameter is provided otherwise a regular build is created.
npm scripts
The only thing left before we can get started writing our first Integration Test is to add some npm scripts for conveniently running them.
{
  "scripts": {
    "serve": "vue-cli-service serve",
    "serve-integration-tests": "vue-cli-service serve --integration-test",
    "build": "vue-cli-service build",
    "lint": "vue-cli-service lint",
    "test:acceptance": "cypress run --browser chrome",
    "test:acceptance-open": "cypress open",
    "test:integration": "cypress_mode=integration cypress run --browser chrome",
    "test:integration-open": "cypress_mode=integration cypress open",
    "test:unit": "vue-cli-service test:unit"
  }
}
Above you can see the serve-integration-tests script for starting a Vue CLI server in Integration Test mode and test:acceptance and test:integration scripts for running tests with Cypress. The test:acceptance-open and test:integration-open scripts are supposed to be used during development for starting the Cypress UI which makes it possible to easily run certain tests during development.
Writing our first Integration Test
Now everything is set up and we’re ready to write our first Integration Test for the ProductTeaserContainer component we’ve created in the previous article.
First of all let’s make some minor updates to the ProductTeaserContainer.vue and ProductGrid.vue components in order to make it easier to write robust tests.
 <template>
   <FrameApi
     v-slot="{ data: products }"
     :endpoint="endpoint"
     immediate
   >
     <ProductGrid
       :products="products"
+      data-qa="product teaser"
     />
   </FrameApi>
 </template>
<template>
<UiGrid>
<UiGridItem
v-for="product in products"
:key="product.name"
:width="[`12/12`, `4/12@m`]"
+ data-qa="product"
>
<ProductCard
:img="product.img"
:name="product.name"
:price="product.price"
/>
</UiGridItem>
</UiGrid>
</template>In the two diff’s above you can see that we’ve added data-qa attributes. This makes it possible to use those as selectors inside of our Cypress tests which means we don’t have to rely on CSS selectors (meant for styling and thus might change which would break our tests).
// src/components/ProductTeaserContainer.integration.js
import { mount, run, setup } from "../../test/utils";
setup(() => {
const ProductTeaserContainer = () => import("./ProductTeaserContainer.vue");
mount(ProductTeaserContainer);
});
export default run(({ url = "ProductTeaserContainer" }) => {
describe("Product teaser", () => {
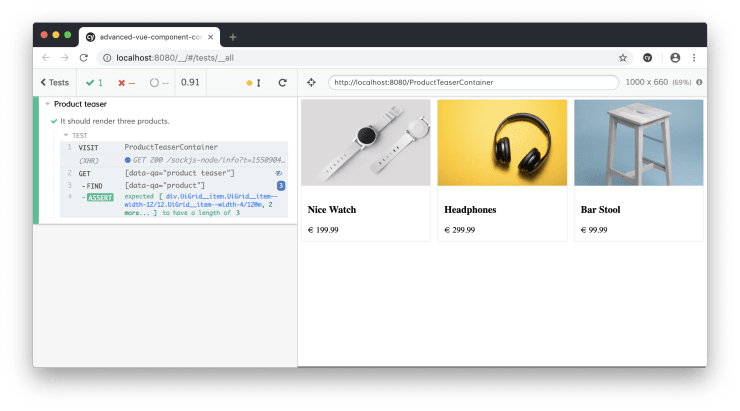
it("should render three products.", () => {
cy.visit(url);
cy.get('[data-qa="product teaser"]')
.find('[data-qa="product"]')
.should("have.length", 3);
});
});
});Above you can see our first Integration Test for the rather simple ProductTeaserContainer component. Let’s walk through it step by step. In the first line you can see that we import three helper functions mount(), run() and setup(). If you’re interested in the implementation of those, you can check out the GitHub repository of this article to take a closer look.
In the callback function of the setup() method, we import and mount the component which we want to test. Next we call the run() utility with a callback function which takes a context object as its only parameter. We can later pass different contexts to our Integration Tests when we reuse them in our acceptance tests. If no context is passed the name of the component is used as the default value for the url property. This is because we’ve configured the Vue CLI to run in multi-page mode and we use the name of the component under test as the URL for the generated page.
npm run serve-integration-tests
# In a new Terminal window
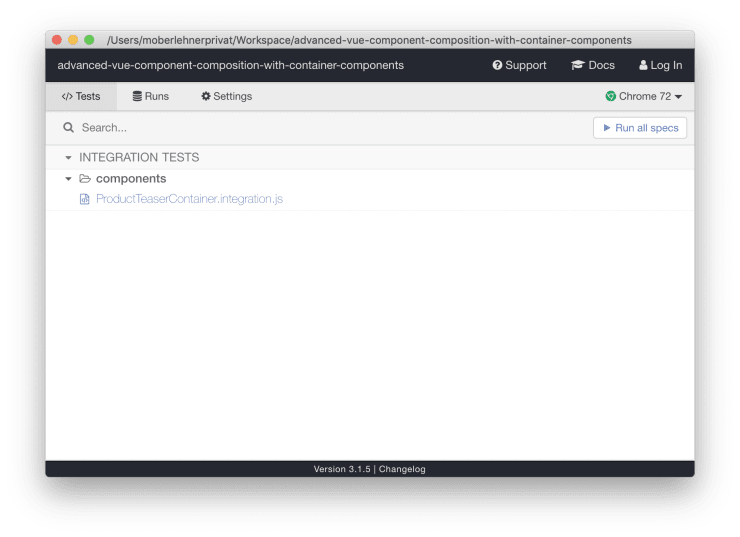
npm run test:integration-openAfter running those npm scripts the Cypress UI opens like you can see in the following screenshot.
Click Run all specs to run our newly created integration test. You can see the result in the screenshot below.
Testing the ProductListingContainer
Now that we’ve warmed up, let’s get a little bit more serious and see how we can write tests for the ProductListingContainer.
// src/components/ProductListingContainer.integration.js
import { mount, run, setup } from "../../test/utils";
import router from "../router";
setup(() => {
const ProductListingContainer = () => import("./ProductListingContainer.vue");
mount(ProductListingContainer, { router });
});
export default run(({ url = "ProductListingContainer" }) => {
describe("Product listing", () => {
const container = () => cy.get('[data-qa="product listing"]');
const grid = () => container().find('[data-qa="product grid"]');
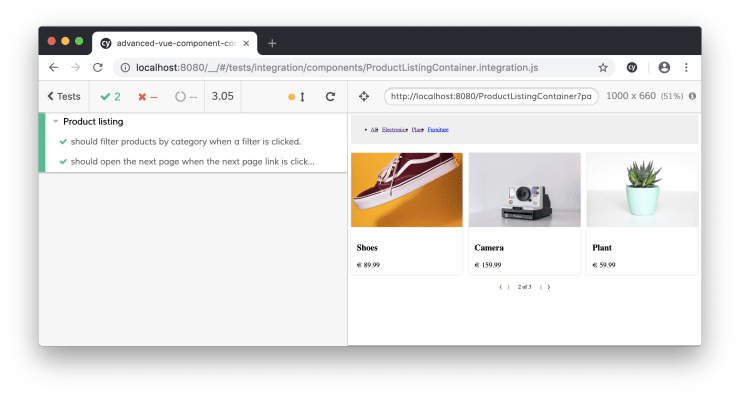
it("should filter products by category when a filter is clicked.", () => {
cy.visit(url);
container().find('[data-qa="filter link"]').eq(2).click();
grid().contains("Plant");
container().find('[data-qa="filter link"]').eq(1).click();
grid().contains("Nice Watch");
grid().contains("Headphones");
grid().contains("Camera");
});
});
});Above you can see that this time we need to provide the router configuration of our application when mounting our component. In the first test for our ProductListingContainer we check if clicking some of the filters does work correctly.
// src/components/ProductListingContainer.integration.js
// ...

export default run(({ url = "ProductListingContainer" }) => {
  describe("Product listing", () => {
    // ...

    it("should open the next page when the next page link is clicked.", () => {
      cy.visit(url);

      container().find('a[data-qa="next page link"]').click();
      grid().contains("Shoes");
      grid().contains("Camera");
      grid().contains("Plant");
    });
  });
});
In this test we make sure that the pagination navigation also works correctly. It’s up to you how much functionality you want to test in your Integration Tests. I’ve decided to don’t go too deep in order to keep the Integration Test suite as fast as possible. As long as we have high quality Unit Tests in place it should be good enough to simply check if we made no mistake integrating the unit tested component into our application by checking some of its basic functionality.
Reusing Integration Tests for Acceptance Testing
Finally let’s take a look at how we can reuse our Integration Tests inside of our Acceptance Tests. In our Acceptance Tests we want to make sure that the features of our application do work correctly under the same circumstances as our users will use them.
The differentiation between Acceptance Tests and Integration Tests might be a little bit confusing at first. As I see it: Acceptance Tests are also Integration Tests but individual Integration Tests are not Acceptance Tests. When writing Integration Tests we focus on a single piece of functionality without caring about its surroundings. Acceptance Tests, on the other hand, should be written from the user’s point of view. A user does not see the separate pieces of our application as distinct parts of functionality, they look at the application as a whole, so our acceptance tests should reflect this.
Testing the homepage
Let’s write our first Acceptance Test for the homepage of our application.
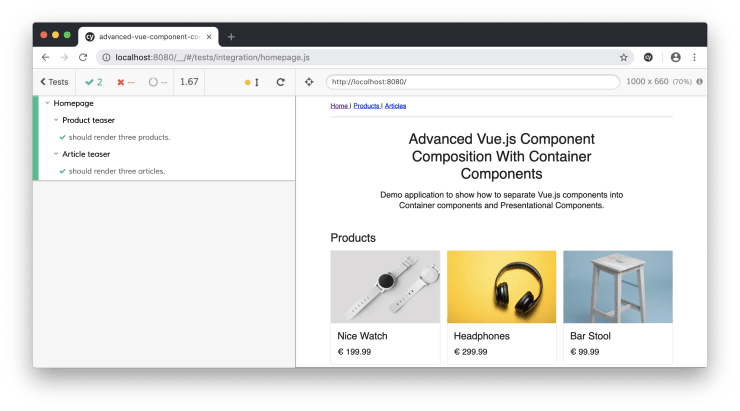
// test/features/homepage.js
import ArticleTeaserContainerIntegration from "../../src/components/ArticleTeaserContainer.integration";
import ProductTeaserContainerIntegration from "../../src/components/ProductTeaserContainer.integration";

describe("Homepage", () => {
  const context = { url: "/" };

  ProductTeaserContainerIntegration(context);
  ArticleTeaserContainerIntegration(context);
});
Above you can see how we can reuse the teaser container Integration Tests for the Acceptance Test of the homepage. By providing a different url via the context object we make sure the correct page is opened inside of our Integration Tests.
Before we can run our acceptance tests we have to make sure to start the correct dev server. Quit the dev server instance we’ve previously started with the npm run serve-integration-tests command before running the following scripts.
npm run serve
# In a new Terminal window
npm run test:acceptance-open
After hitting Run all specs you should see the following result.
Do you want to learn more about testing Vue.js applications?
Register for the Newsletter of my upcoming book: Advanced Vue.js Application Architecture.
Testing the product page
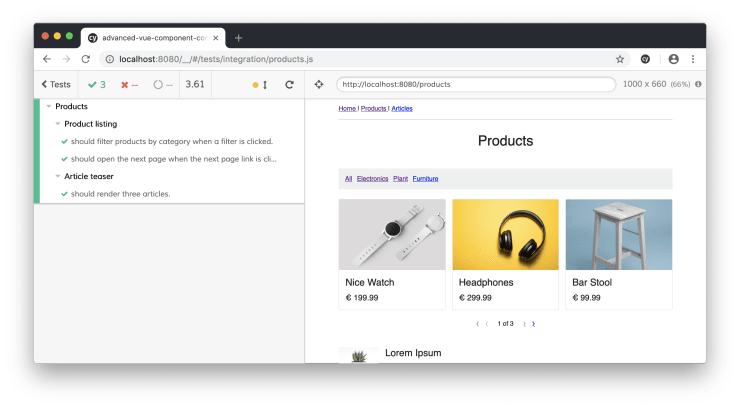
In the next example we see the test, which ensures that all acceptance criteria of our product page are fulfilled.
import ArticleTeaserContainerIntegration from "../../src/components/ArticleTeaserContainer.integration";
import ProductListingContainerIntegration from "../../src/components/ProductListingContainer.integration";

describe("Products", () => {
  const context = { url: "/products" };

  ProductListingContainerIntegration(context);
  ArticleTeaserContainerIntegration(context);
});
Wrapping it up
By using a test runner like Cypress, which is powered by a real browser, for running our integration tests, we gain another level of confidence that our code works as expected in the real world. The possibility to see our Container Components in isolation can also be very beneficial during development especially if you practice TDD.
Additionally, we’re able to reuse our integration tests in our Acceptance Tests which prevents us from having to make a choice between either duplicating a lot of test code or testing a certain functionality only on one page but not on other pages using the same component.
Thanks to applying such a rigid system for testing our application we’re able to confidently refactor our code base and also work on new features without having to worry about breaking anything without noticing it until it hits production and users start complaining.