Automated Acceptance Testing with Cypress and Vue.js Part 2: Network Stubs and Timers
This is the second part of my article series about automated acceptance testing with Cypress. In the first part of this series we’ve learned how to set up Cypress. Today we take a look at two advanced features of Cypress: Network Stubs and Timers.
If you want to see the full code used in this article, you can check out the GitHub repository for this article.
Acceptance testing vs. end-to-end testing
Before we delve deeper into the matter, let’s think about the difference between end-to-end testing and automated acceptance testing. Although Cypress advertises itself as a tool for end-to-end testing, and it doesn’t mention acceptance testing anywhere on its website, I choose the term “acceptance testing” for the title of this article. Mostly because of one major reason: real end-to-end testing means that you are testing your application under real-word conditions from one end (the client) to the other end (usually the database). All of the technologies in between have to work the same way as they do on your production system. This is not what I want to accomplish with the examples I’m showing throughout this series.
End-to-end testing
Although it can be extremely valuable, doing “real” end-to-end testing is pretty hard to do. You need some way of spinning up a system that is mostly identical to your production system and in a known state, every time you start an end-to-end test. Or, if you’re doing it in hard mode, you run your tests directly on your live system, which comes with a variety of challenges, most notably the requirement of not affecting the users’ data in any way (if your tests are writing data in the database, nobody should see this data).
Acceptance testing
Acceptance testing on the other hand, focuses only on one part of the system (in our case the client-side app). Similar to unit testing, we just assume that all other parts of the system, like the API and the database, work as expected.
The bottom line
End-to-end testing can be very valuable but it’s hard to set up. Even more you don’t want to run your end-to-end tests to validate if the ten lines of code you just wrote broke the build. Thats what unit tests and – as a second line of defense – acceptance tests are for. Acceptance tests are used during development, to validate if your implementation meets the acceptance criteria which your product manager has defined and end-to-end tests are used to validate if your system as a whole works as expected.
Fake it till you make it
The reason why it’s important to differentiate between acceptance testing and end-to-end testing is that while we want our test system, on which we run the end-to-end tests, to be as similar to the production system as possible, in the case of acceptance testing, we want to fake / mock / stub everything that is not part of the system we’re testing.
Network stubs
There are multiple reasons why we don’t want to make requests to a real API in our acceptance tests. Most importantly it makes things more complicated. Imagine we have tests where we want to test how our application behaves when a user has entered all of their data, and another one where a user has entered none of their data, and a third test which tests what happens when some specific data is there. We want to provide the exact data we need for our specific test case without having to create multiple entries, matching our test cases, in a database.
Let’s write a test for our simple application we’ve set up in the first part of this article series which defines that we want to show the name of the logged in user, if a user is logged in.
// test/features/home.js
describe("Home", () => {
  // ...

  it("Should display the name of the curent user in the header.", () => {
    cy.visit("/");
    cy.get('[data-qa="header"] [data-qa="username"]').should(
      "contain",
      "JohnDoe",
    );
  });
});
In the example above, you can see that we’ve added a new test to our existing tests we’ve created in the first part of the series. If you want to see the full code, you can check out the GitHub repository for this article.
In the test, we use data selectors to find the element which should contain the name of the currently logged in user. Let’s start our development server with npm start and the Cypress GUI with npm run test:open to run our test and see it fail.

The feature is not implemented yet, the test fails
To make the test pass, we need to implement the functionality first. Let’s update our PageHome component to fetch the currently logged in user and display its username.
<template>
  <div :class="$options.name">
    <header data-qa="header">
      <p v-if="user" data-qa="username">{{ user.username }}</p>
    </header>
    <main>
      <h1 data-qa="main headline">Home</h1>
    </main>
  </div>
</template>

<script>
import axios from "axios";

// This would usually come from a cookie or the local storage.
const currentUserId = 1;

export default {
  name: "PageHome",
  data() {
    return {
      user: null,
    };
  },
  created() {
    this.fetchUser(currentUserId);
  },
  methods: {
    async fetchUser(id) {
      const response = await axios.get(
        `https://jsonplaceholder.typicode.com/users/${id}`,
      );

      this.user = response.data;
    },
  },
};
</script>
Above you can see that we’re conditionally rendering a <p> tag containing the username, if a user object is available. In the JavaScript block, we’re fetching the currently logged in user.
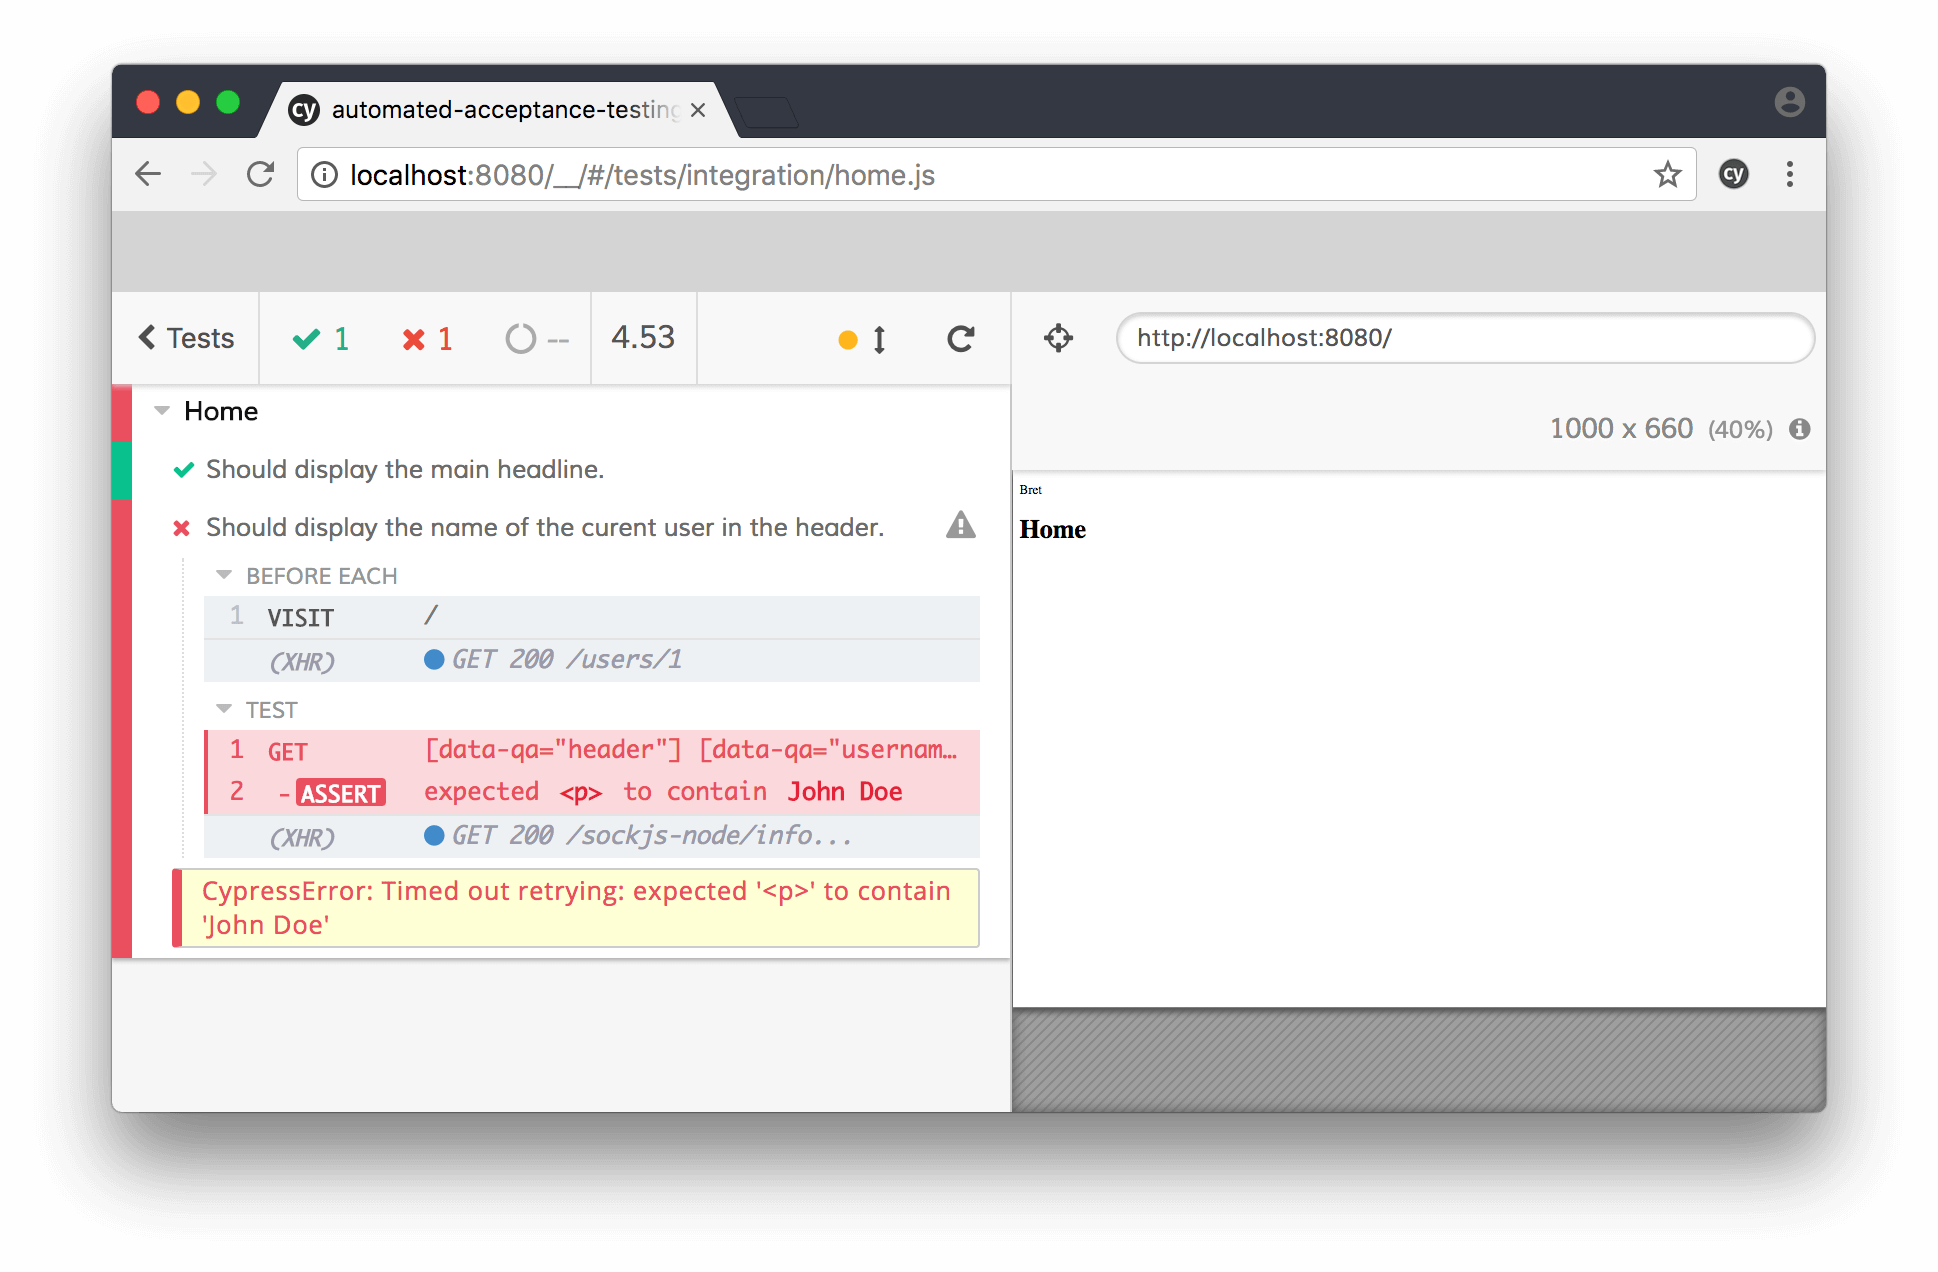
The real API returns a real username
As you can see in the screenshot above, our test is still failing, because the username we get from the placeholder API (which would be your real API in real-word code) does not match the username we’ve specified in our test.
We’re currently making a request to a real API even in our acceptance tests. Because we don’t want our tests to rely on a real API, and because we want to have full control over what data we do expect from the API, let’s stub the API response.
it("Should display the name of the curent user in the header.", () => {
  // Enable response stubbing.
  cy.server();
  // Route the API request to a stubbed response.
  cy.route({
    method: "GET",
    url: "/users/*",
    response: { username: "JohnDoe" },
  });
  cy.visit("/");

  cy.get('[data-qa="header"] [data-qa="username"]').should(
    "contain",
    "JohnDoe",
  );
});
In order to enable response stubbing, we have to run cy.server() before the first request to the API is made. By defining the route we want to mock with cy.route() we basically override every request that matches the url pattern to return the response we’ve specified.
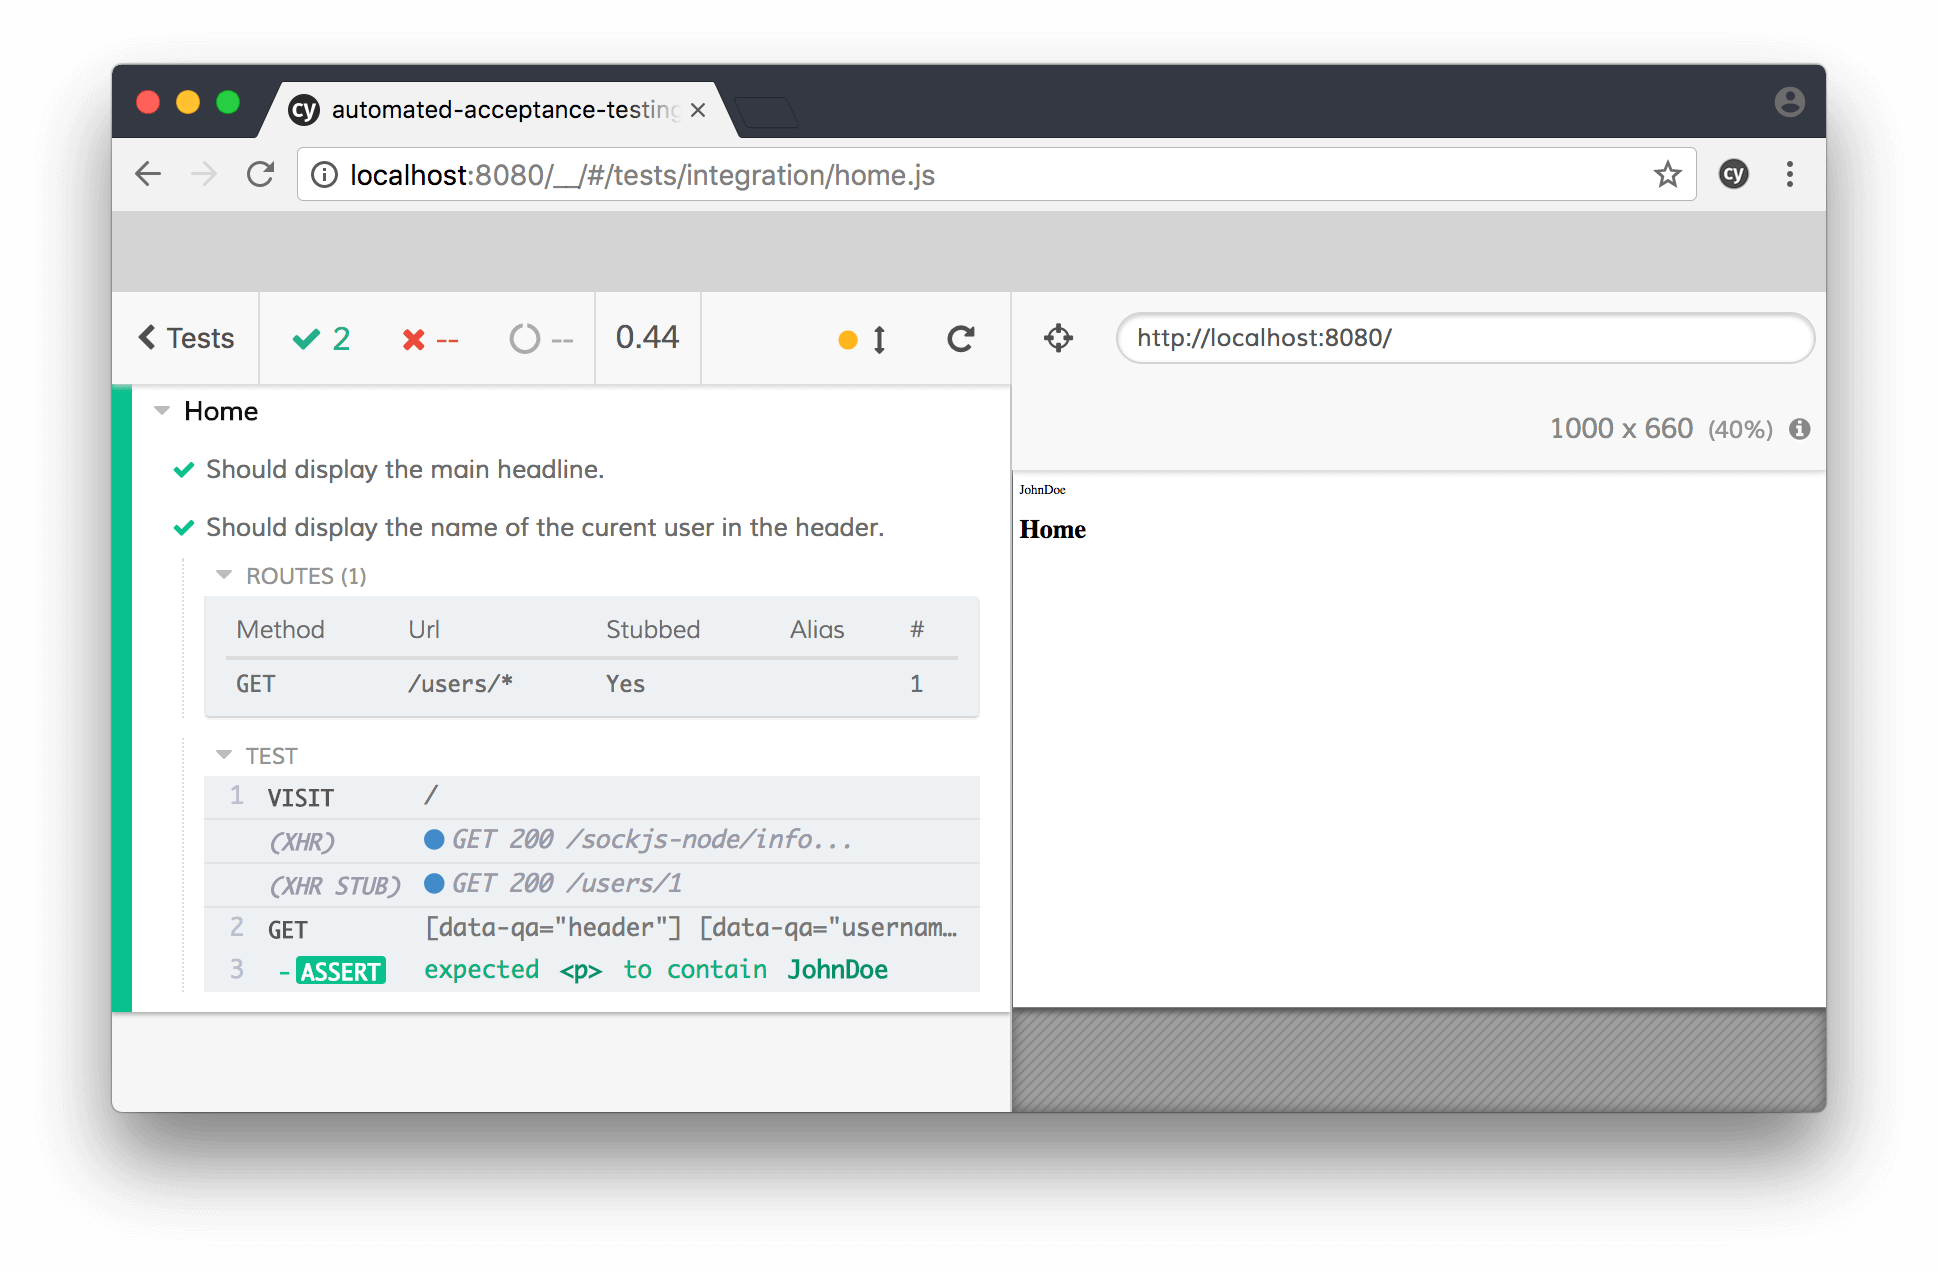
The username from the stubbed response is displayed
As you can see in the screenshot above, the expected username is showing and our test is finally succeeding.
Do you want to learn more about advanced Vue.js techniques?
Register for the Newsletter of my upcoming book: Advanced Vue.js Application Architecture.
Time traveling
Let’s assume we’re building an ultra secure application and we want to automatically logout users after five minutes of inactivity (which is defined as not clicking anywhere). But we want to give them a warning after four and a half minutes of inactivity, so they can prevent being logged out.
it("Should display a logout warning after 270 seconds of inactivity.", () => {
  const waitSeconds = 270;
  const waitMilliseconds = waitSeconds * 1000;
  const buffer = 1000;

  cy.visit("/");
  cy.wait(waitMilliseconds + buffer);
  cy.get('[data-qa="logout warning"]').should("be.visible");
});
Although testing this requirement the way you can see above would work, there is one huge problem with this test, it would take a little bit more than four and a half minutes to run this test, which is about four and a half minutes too long.
Luckily, Cypress got us covered and provides the very useful cy.clock() method. Let’s rewrite our test to make use of Cypress clocks.
it("Should display a logout warning after 270 seconds of inactivity.", () => {
  const waitSeconds = 270;
  const waitMilliseconds = waitSeconds * 1000;
  const buffer = 1000;

  cy.clock();
  cy.visit("/");
  cy.tick(waitMilliseconds + buffer);
  cy.get('[data-qa="logout warning"]').should("be.visible");
});
In the code snippet above, you can see that we’re now initializing a clock with cy.clock() and we’re using cy.tick() to turn the clock forward the specified amount of time. That way we don’t have to wait the actual amount of time but we can check immediately if the logout warning appears after the specified timeout.
Because we’ve not yet implemented the functionality, our test will fail if we run it now. Let’s fix that and implement the functionality to show the logout warning.
<template>
  <div id="app" @click.capture="resetInactivityTimer">
    <router-view></router-view>
    <p v-if="showLogoutWarning" data-qa="logout warning">
      You'll be logged out in 30 seconds!
    </p>
  </div>
</template>

<script>
export default {
  name: "App",
  data() {
    return {
      userInactivityInMs: 0,
      showLogoutWarning: false,
    };
  },
  created() {
    const warningTimerInMs = 270 * 1000;
    const intervalInMs = 1000;

    setInterval(() => {
      if (this.userInactivityInMs >= warningTimerInMs) {
        this.showLogoutWarning = true;
      } else {
        this.showLogoutWarning = false;
      }

      this.userInactivityInMs += intervalInMs;
    }, intervalInMs);
  },
  methods: {
    resetInactivityTimer() {
      this.userInactivityInMs = 0;
    },
  },
};
</script>
Above you can see the code of our App component. On the root element, we’re listening for click events inside of the app and we trigger the resetInactivityTimer() method if one is detected. The <p> tag in the template, is only rendered if the variable showLogoutWarning is true. In the created() method of our component, we’re checking every 1000 milliseconds if the userInactivityInMs has exceeded the warningTimerInMs, if yes, we’re activating the logout warning.

The tests succeed without having to wait
If we run our test again, we can see that it succeeds, and we can see that it succeeds almost immediately instead of having to wait the actual four and a half minutes.
Wrapping it up
In my opinion, end-to-end tests should do exactly that, test the application, under real conditions, exactly the way the user would use the app, from one end (client facing application) to the other end (backend and database). Everything should be more or less the real deal and no network request is stubed an no timer is manipulated.
On the other hand, if we want to make sure that our app meets the acceptance criteria, assuming that every other part of the system does work correctly, we are free to fake everything which is not the feature under test, including time itself.