Visual Regression Testing With Vitest
- #tdd ,
- #vitest ,
- #playwright
Visual regression testing is the perfect tool to catch regressions within our UI component libraries and applications early, yet few teams practice it. Teams often avoid it due to complicated setups, cumbersome workflows, and difficulties syncing tests across different operating systems.
In this article, we’ll explore how to use Vitest to power our visual regression tests and set up a straightforward workflow every team can adopt to create fast and stable tests. Additionally, we’ll walk through how to use Docker to create visual regression test snapshots that are stable across different operating systems and development machines.
Warning: As of this writing, Vitest 4.x with visual regression testing is still in beta. Expect some rough edges.
Basic Vitest browser setup for visual regression testing
Vitest offers a dedicated init command to help us get started quickly by setting up Vitest with browser mode enabled:
npx vitest init browserSelect:
TypeScriptorJavaScriptplaywright(others might work too)chromium(others should work too)- Your framework of choice
- Install Playwright browsers
While Vitest 3.x is the latest stable release, the toMatchScreenshot() functionality is only available in the 4.x beta, so we need to update the relevant packages:
npm install -D vitest@4.0.0-beta.13 @vitest/browser@4.0.0-beta.13 vitest-browser-react@2.0.0-beta.3Next, let’s add two new scripts to the scripts section of our package.json file:
     "lint": "eslint . --fix",
+    "test:visual": "vitest run --config=vitest.browser.config.ts",
+    "test:visual:update": "vitest run --update --config=vitest.browser.config.ts"
  },
  "dependencies": {
We use the first script to run Vitest with a separate browser config and the second one to update our reference screenshots, a process we will cover in more detail later.
Next, we update our .gitignore to ignore the .vitest-attachments directory that Vitest creates when our regression tests fail:
 .env
 /node_modules/

+# Vitest
+.vitest-attachments
Loading CSS in Vitest browser mode
While we typically don’t load CSS for unit tests in Vitest, it’s essential for tests running in browser mode, especially for visual regression tests. So let’s configure Vitest to load our main CSS file.
First, we create a new ./test/browser-setup.ts file:
// ./test/browser-setup.ts
import "../app/app.css";
The next step is to load this setup file in our ./vitest.browser.config.ts and tell Vitest to include all CSS files:
// ./vitest.browser.config.ts
import tsconfigPaths from "vite-tsconfig-paths";
import { defineConfig } from "vitest/config";
import tailwindcss from "@tailwindcss/vite";
import react from "@vitejs/plugin-react";
import { playwright } from "@vitest/browser/providers/playwright";

export default defineConfig({
  plugins: [react(), tailwindcss(), tsconfigPaths()],
  test: {
    // Load the browser setup file ...
    setupFiles: ["./test/browser-setup.ts"],
    // ... and include all CSS files
    css: {
      include: /.+/,
    },
    browser: {
      enabled: true,
      headless: true,
      provider: playwright(),
      instances: [{ browser: "chromium" }],
      viewport: {
        width: 1280,
        height: 768,
      },
    },
  },
});
Now our basic setup is ready to run the tests with Vitest and Playwright.
Writing visual regression tests
Let’s write our first visual regression test for a DataTable React component:
import { expect, it } from "vitest";
import { render } from "vitest-browser-react";
import { columns } from "~/components/columns";
import { DataTable } from "~/components/data-table";
import tasks from "~/data/tasks.json";

it("renders correctly", async () => {
  const screen = await render(<DataTable columns={columns} data={tasks} />);
  await expect.element(screen.baseElement).toMatchScreenshot("data-table");
});
The process is straightforward: we render a component and use the toMatchScreenshot() assertion with a name (e.g., data-table).
When we run our test for the first time, a new reference screenshot is created:
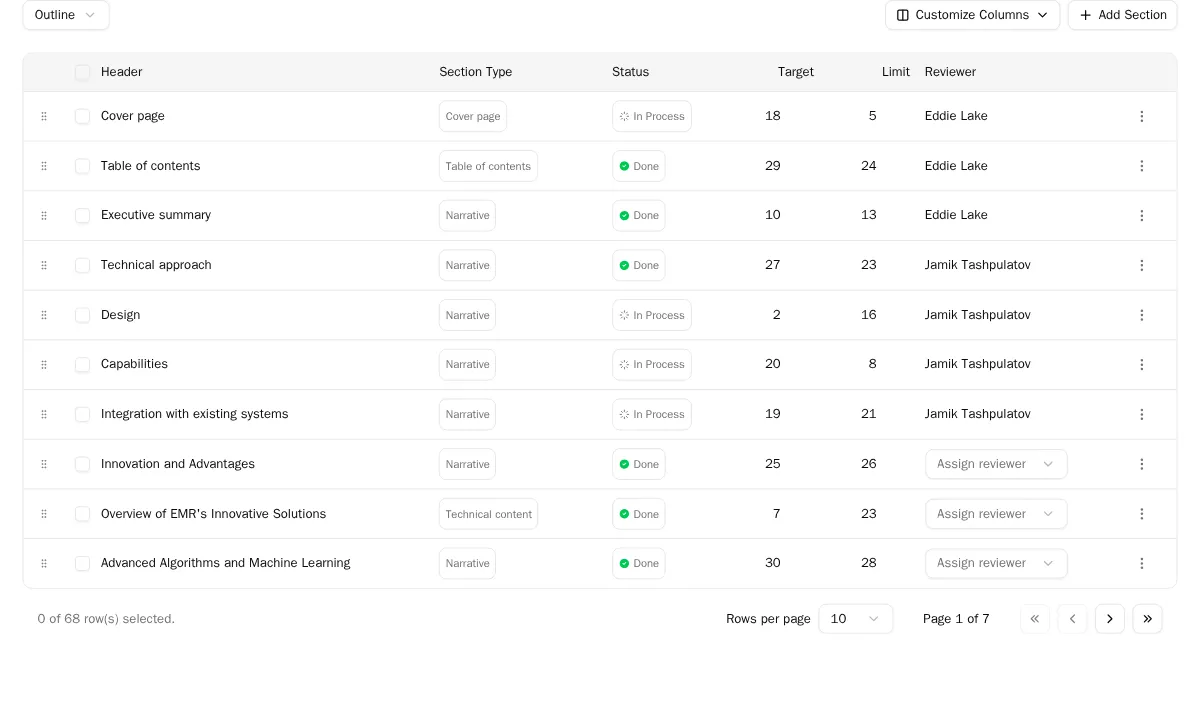
Reference screenshot of a data table React component
Now, make a visual change to your component and run the test again. The test will fail because the newly generated screenshot no longer matches the reference screenshot. You can inspect the generated diff in the .vitest-attachments directory to see what changed.
Failure screenshot:
  - app/components/__screenshots__/data-table.spec.tsx/renders-correctly-1.png

 ❯ app/components/data-table.spec.tsx:7:0
      4| import { DataTable } from "~/components/data-table";
      5| import tasks from "~/data/tasks.json";
      6|
       | ^
      7| it("renders correctly", async () => {
      8|   const screen = await render(<DataTable columns={columns} data={tasks} />);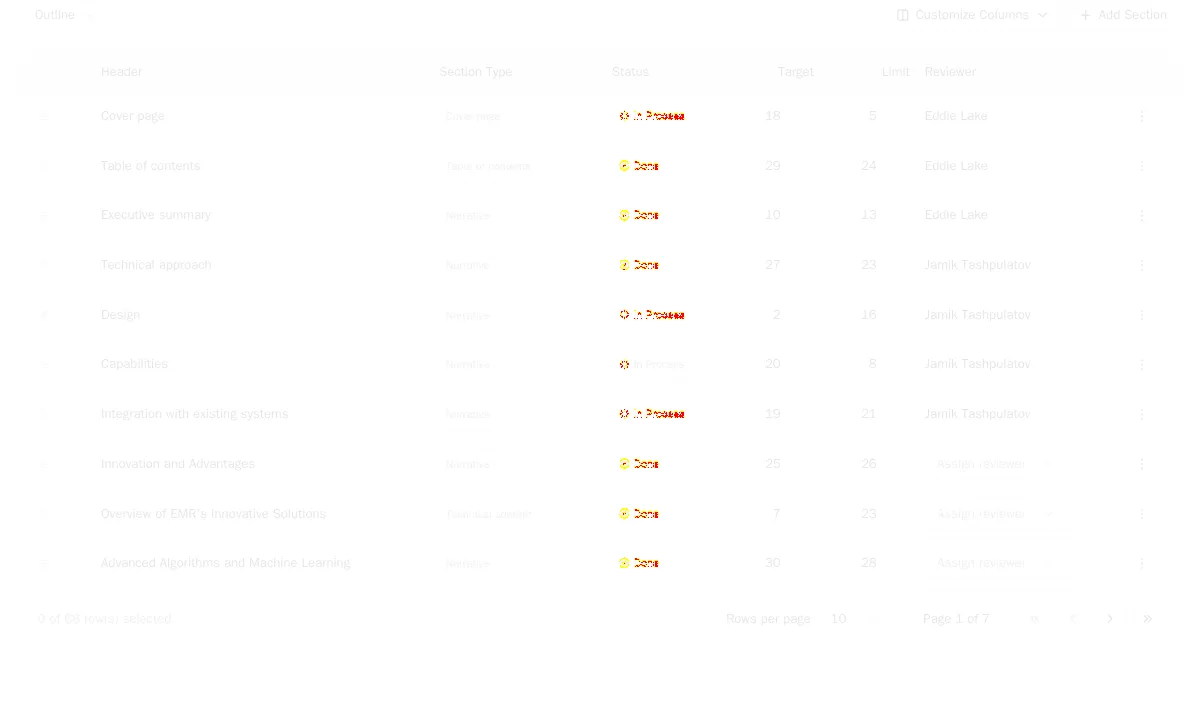
Diff of the expected and actual result screenshot after making a change to the CSS
If this change was intentional, you can accept the new version by running npm run test:visual:update to update the reference screenshot.
Run Vitest browser tests in dockerized Playwright
While this setup works perfectly on a single machine, a common challenge arises when running tests across different environments, such as a local machine and a CI server. If your CI environment runs on Linux and you’ve created the reference screenshots on macOS or Windows, your regression tests will very likely fail.
This is because web app rendering can differ slightly across operating systems due to variations in font rendering and other platform-specific details. For instance, anti-aliasing algorithms for text can vary, causing pixels to differ slightly even when the output looks identical to the human eye.
Fortunately, we have a solution for this: Docker. By running our tests in a standardized Playwright Docker container, we can ensure that our component screenshots are always consistent and don’t differ due to rendering variations across different operating systems.
Setting up a Playwright Docker container
To achieve this, we’ll use Docker Compose to manage our test environment. Create a docker-compose.yml file with the following content. Note that the app service is an example for running your application; you can adjust it to your needs or omit it if you run your app separately.
services:
  app:
    build:
      context: .
    environment:
      - NODE_ENV=production
    ports:
      - "${APP_PORT:-3000}:3000"
    restart: unless-stopped

  playwright:
    image: mcr.microsoft.com/playwright:v1.44.1-jammy
    user: pwuser
    working_dir: /home/pwuser
    init: true
    tty: true
    stdin_open: true
    ports:
      - "3100:3000"
    command:
      ["sh", "-c", "npx -y playwright run-server --port 3000 --host 0.0.0.0"]
    restart: "no"
The playwright service pulls an official Microsoft Playwright image, exposes a port for communication (mapping port 3100 on the host to 3000 in the container), and starts a Playwright server that listens for connections.
Next, we need to update our test scripts in package.json. We’ll modify them to connect to the Playwright instance running inside the container via the PW_TEST_CONNECT_WS_ENDPOINT environment variable:
     "format": "prettier --write .",
     "lint": "eslint . --fix",
-    "test:visual": "vitest run --config=vitest.browser.config.ts",
-    "test:visual:update": "vitest run --update --config=vitest.browser.config.ts"
+    "test:visual": "PW_TEST_CONNECT_WS_ENDPOINT=ws://127.0.0.1:3100 vitest run --config=vitest.browser.config.ts",
+    "test:visual:update": "PW_TEST_CONNECT_WS_ENDPOINT=ws://127.0.0.1:3100 vitest run --update --config=vitest.browser.config.ts"
   },
   "dependencies": {
Finally, we’ll adjust our Vitest browser configuration (./vitest.browser.config.ts). We need to tell it to use the WebSocket endpoint when available. We’ll also add a custom resolveScreenshotPath function. This is important because Vitest’s default screenshot filename includes the operating system. Since our tests now run in a Linux container, the host OS (e.g., macOS or Windows) is irrelevant and misleading. This function creates a clean path without the OS name, ensuring consistency.
     browser: {
       enabled: true,
       headless: true,
+      expect: {
+        toMatchScreenshot: {
+          resolveScreenshotPath: ({
+            arg,
+            browserName,
+            ext,
+            testFileDirectory,
+            testFileName,
+          }) =>
+            `${testFileDirectory}/__screenshots__/${testFileName}/${arg}-${browserName}${ext}`,
+        },
+      },
-      provider: playwright(),
+      provider: playwright({
+        connectOptions: process.env.PW_TEST_CONNECT_WS_ENDPOINT
+          ? {
+              wsEndpoint: process.env.PW_TEST_CONNECT_WS_ENDPOINT,
+              exposeNetwork: "<loopback>",
+            }
+          : undefined,
+      }),
      instances: [{ browser: "chromium" }],
      viewport: {
        width: 1280,
Now, to run the tests, we first start Playwright in Docker:
docker compose up playwrightThen, we can run our tests with npm run test:visual. This command now connects to the Playwright instance inside the Docker container, creating consistent screenshots regardless of whether we run it on a Windows, macOS, or Linux host system.
Visual Regression Testing Workflow
Now that we have a stable, cross-platform setup, let’s define a clear and repeatable workflow that our team can follow for visual regression testing.
Reports
When a visual regression test fails, we want to see the difference between the reference and the new screenshot. Vitest provides a built-in HTML reporter that’s perfect for this, as it embeds the diff images directly into the report. Let’s install it along with serve, a simple package for serving static files like the generated HTML report:
npm install -D @vitest/ui@4.0.0-beta.13 serveNext, let’s update our package.json scripts. We’ll add the --reporter=html flag to our main test script and create a new test:visual:report script to easily view the generated report:
     "format": "prettier --write .",
     "lint": "eslint . --fix",
-    "test:visual": "PW_TEST_CONNECT_WS_ENDPOINT=ws://127.0.0.1:3100 vitest run --config=vitest.browser.config.ts",
-    "test:visual:update": "PW_TEST_CONNECT_WS_ENDPOINT=ws://127.0.0.1:3100 vitest run --update --config=vitest.browser.config.ts"
+    "test:visual": "PW_TEST_CONNECT_WS_ENDPOINT=ws://127.0.0.1:3100 vitest run --config=vitest.browser.config.ts --reporter=html",
+    "test:visual:update": "PW_TEST_CONNECT_WS_ENDPOINT=ws://127.0.0.1:3100 vitest run --update --config=vitest.browser.config.ts",
+    "test:visual:report": "serve ./html"
   },
   "dependencies": {
Since the HTML report is a generated build artifact, we must not commit it to our Git repository. Let’s add the output directory (./html) to our .gitignore file:
 # Vitest
 /.vitest-attachments
+/html
Workflow
With all the pieces in place, here is a summary of the day-to-day workflow for a developer making UI changes:
- Make changes to existing components or add new ones.
- Start the Playwright server:
docker compose up playwright - Run the visual regression tests:
npm run test:visual - Open the report to check if all visual changes match your expectations:
npm run test:visual:report - If the changes are intentional, update the reference screenshots:
npm run test:visual:update - Commit your code changes along with the updated reference screenshots.
By following this process, we actively review all visual changes, preventing accidental regressions from reaching production.
Wrapping it up
Although I love Vitest for running my unit tests, I’m not yet 100% convinced that I want to use it for regression tests, too. We can already do visual regression testing perfectly well using only Playwright without Vitest as a test runner. This approach offers the flexibility to run regression tests not only on individual components but also on entire pages.
Perhaps this is why Vitest 4.x is still in beta. I’ll be watching for the final release and will update this article accordingly. Stay tuned!