Using the Google Maps API with Vue.js
In today’s article, we take a look at how we can use the Google Maps API in combination with Vue.js. We build a simple Vue.js component, which renders a Google Map. Furthermore, we learn how to listen for click events on markers and how we can cluster multiple markers in close distance to each other.
You can take a look at the complete source code on GitHub, or you can check out the demo application hosted on Netlify.
Table of Contents
- The vue2-google-maps plugin
- Loading the Google Maps API
- Rendering a simple map
- Rendering markers
- Cluster markers
- Handle click events on markers
The vue2-google-maps plugin
Before we get started with building our custom implementation, let me point out that there already is a pretty good Vue.js plugin named vue2-google-maps which makes it possible to assemble a map and its markers in a declarative manner.
<GmapMap :center="{ lat: 10, lng: 10 }">
  <GmapMarker
    v-for="(m, index) in markers"
    :key="index"
    :position="m.position"
    @click="center = m.position"
  />
</GmapMap>
Although I find the declarative approach pretty interesting and very Vue-ish, in this article, we do not use this plugin but instead, use the bare Google Maps API. There are two reasons for this decision: first of all, using the plugin adds some overhead in terms of bundle size and second it also adds some overhead in terms of finding out how to do more complicated stuff with the API. If we use the raw API instead, we can read the documentation or some StackOverflow threads to learn how to do certain things. On the other hand, if we use the plugin, we might have trouble finding out how to do more advanced stuff, which might not be covered by the documentation of the vue2-google-maps plugin.
Loading the Google Maps API
In the following code snippet, you can see the init() function, which we later use to load the Google Maps script initially. This allows loading the Google Maps script on-demand, which means that we can delay loading the script until we want to render a Google Map.
// src/utils/gmaps.js

// Your personal API key.
// Get it here: https://console.cloud.google.com/google/maps-apis
const API_KEY = "AIzaSyCWAaBJsI1234TI18PITVy7p0Qb6ht123";
const CALLBACK_NAME = "gmapsCallback";

let initialized = !!window.google;
let resolveInitPromise;
let rejectInitPromise;
// This promise handles the initialization
// status of the google maps script.
const initPromise = new Promise((resolve, reject) => {
  resolveInitPromise = resolve;
  rejectInitPromise = reject;
});

export default function init() {
  // If Google Maps already is initialized
  // the `initPromise` should get resolved
  // eventually.
  if (initialized) return initPromise;

  initialized = true;
  // The callback function is called by
  // the Google Maps script if it is
  // successfully loaded.
  window[CALLBACK_NAME] = () => resolveInitPromise(window.google);

  // We inject a new script tag into
  // the `<head>` of our HTML to load
  // the Google Maps script.
  const script = document.createElement("script");
  script.async = true;
  script.defer = true;
  script.src = `https://maps.googleapis.com/maps/api/js?key=${API_KEY}&callback=${CALLBACK_NAME}`;
  script.onerror = rejectInitPromise;
  document.querySelector("head").appendChild(script);

  return initPromise;
}
Google Maps makes it possible to specify the name of a callback function in the URL which we use to load the script. When this callback function is called we resolve the initialization promise which signals to us that Google Maps is ready.
Rendering a simple map
We now can use the init() function inside of our Vue.js component which should render the map. After initializing Google Maps we can create a new map with google.maps.Map().
<template>
  <div class="App" />
</template>

<script>
import gmapsInit from "./utils/gmaps";

export default {
  name: "App",
  async mounted() {
    try {
      const google = await gmapsInit();
      const geocoder = new google.maps.Geocoder();
      const map = new google.maps.Map(this.$el);

      geocoder.geocode({ address: "Austria" }, (results, status) => {
        if (status !== "OK" || !results[0]) {
          throw new Error(status);
        }

        map.setCenter(results[0].geometry.location);
        map.fitBounds(results[0].geometry.viewport);
      });
    } catch (error) {
      console.error(error);
    }
  },
};
</script>

<style>
html,
body {
  margin: 0;
  padding: 0;
}

.App {
  width: 100vw;
  height: 100vh;
}
</style>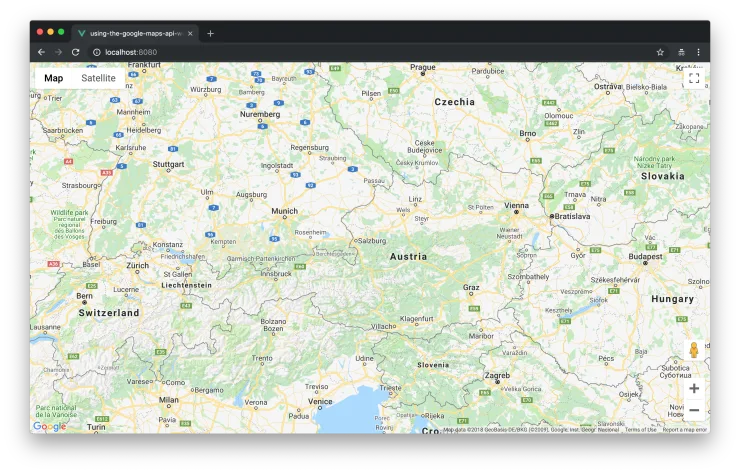
Do you want to learn more about advanced Vue.js techniques?
Register for the Newsletter of my upcoming book: Advanced Vue.js Application Architecture.
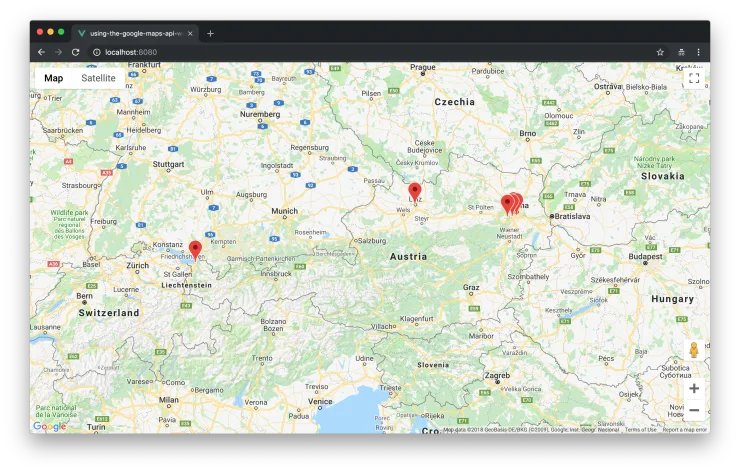
Rendering markers
So far so good but currently our map is a little empty. Let’s change this by adding some markers.
const locations = [
  {
    position: {
      lat: 48.16091,
      lng: 16.38333,
    },
  },
  {
    position: {
      lat: 48.17427,
      lng: 16.32962,
    },
  },
  // ...
];
map.setCenter(results[0].geometry.location);
map.fitBounds(results[0].geometry.viewport);
});
+
+ const markers = locations
+ .map(x => new google.maps.Marker({ ...x, map }));
} catch (error) {
// eslint-disable-next-line no-console
console.error(error);In the two code snippets above you can see that we’ve added an array of locations. Inside of the mounted() hook of our component we iterate over all of the locations and create a new marker for each of it.
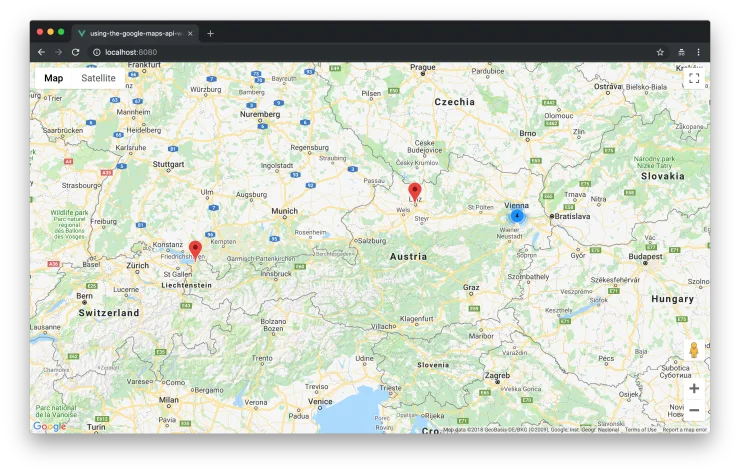
Cluster markers
When previously our map was too empty, now it is definitely too crowded – at least in the area of Vienna. But we can use the @google/markerclusterer library to merge markers which are very close to each other.
npm install @google/markerclusterer </template>
<script>
+import MarkerClusterer from '@google/markerclusterer';
+
import gmapsInit from './utils/gmaps';
const locations = [ const markers = locations
.map(x => new google.maps.Marker({ ...x, map }));
+
+ new MarkerClusterer(map, markers, {
+ imagePath: 'https://developers.google.com/maps/documentation/javascript/examples/markerclusterer/m',
+ });
} catch (error) {
console.error(error);After installing the @google/markerclusterer package, we can import it into our component and use it to cluster certain markers close to each other. You can see the result in the following screenshot.
Handle click events on markers
Currently not too much is going on with our map. Let’s add at least some interactivity by binding a click handler on our markers.
         map.fitBounds(results[0].geometry.viewport);
       });

+      const markerClickHandler = (marker) => {
+        map.setZoom(13);
+        map.setCenter(marker.getPosition());
+      };
+
       const markers = locations
-        .map(x => new google.maps.Marker({ ...x, map }));
+        .map((location) => {
+          const marker = new google.maps.Marker({ ...location, map });
+          marker.addListener('click', () => markerClickHandler(marker));
+
+          return marker;
+        });

       new MarkerClusterer(map, markers, {
Now, if a user clicks on a marker, we simply zoom closer. Admittedly not too exiting stuff, but you get the point.
Wrapping it up
Integrating the Google Maps API into a Vue.js application is pretty straightforward. One concern though using it, is the dependence on Google. Sadly currently, for most projects where some kind of map is needed, there is no way around Google Maps so far (although OpenStreetMaps can be a valid alternative in certain cases). On the other hand, Google Maps is a really powerful tool and it’s still free if you don’t have a lot of traffic.