Implementing an Authentication Flow with Passport and Netlify Functions
A few weeks ago I started working on a small side project where it is a requirement to authenticate users. It was pretty clear to me that I didn’t want to roll my own custom authentication flow, but I didn’t want to go the cheap way and work with Netlify Identity either, because although I’m sure it’s great (like any Netlify service), I want to learn new things with my side projects. So I decided to go the middle way and use the very popular Passport Express middleware.
You can take a look at the complete source code on GitHub or you can check out the demo application hosted on Netlify.
Netlify Dev
The new Netlify Dev CLI makes it a lot easier to work with Netlify Functions in a local development environment. But there are some pitfalls you have to watch out for. Let’s get started by setting up Netlify Dev to work with our Vue CLI powered setup.
npm install --save-dev netlify-clinpx netlify loginAfter we have installed the Netlify CLI as a dependency of our project and successfully logged in, we can continue configuring Netlify for our project.
Creating a new GitHub app
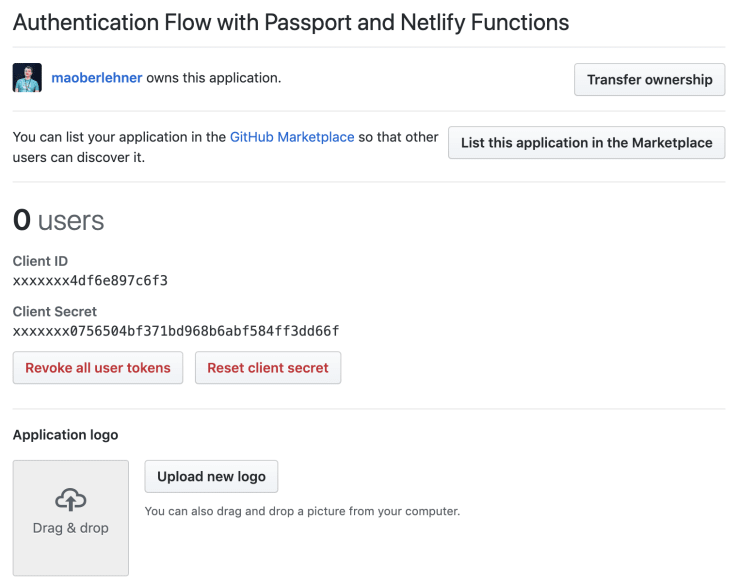
We use GitHub as our authentication provider of choice. To authenticate our users with GitHub, we must first create a new GitHub app. Go to Settings / Developer settings and click New OAuth App.
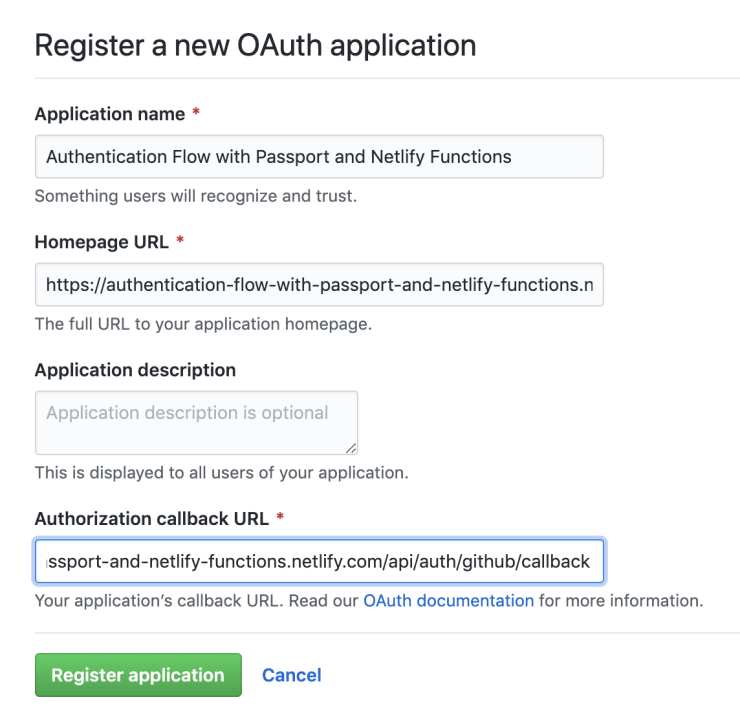
Above you can see that we set the callback URL of our application to /api/auth/github/callback. Keep in mind that you should create a separate OAuth application for your development environment, where you can set the correct authorization callback URL.
If you want to use additional OAuth-based authentication providers like Facebook or Twitter, the process is pretty similar.
Configuring Netlify
After setting up our new GitHub OAuth application we proceed configuring Netlify for our project. First of all we have to create a new project on Netlify and set some environment variables.
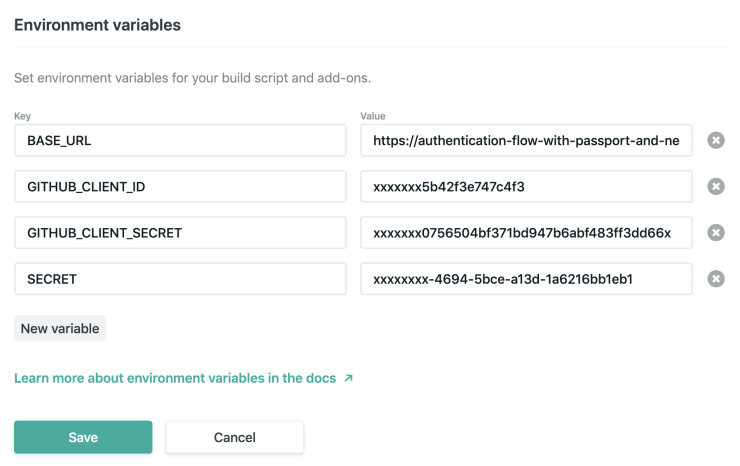
After that we can run npx netlify link in our local development environment to link our local directory to the remote Netlify project. Choose Use current git remote url when asked How do you want to link this folder to a site? (assuming you’ve set up your Netlify project with Git).
Now all of our remote environment variables are also available during local development. Let’s create a new lambda/config.js file which we can use to store all of our configuration settings.
// lambda/utils/config.js
// Circumvent problem with Netlify CLI.
// https://github.com/netlify/netlify-dev-plugin/issues/147
exports.BASE_URL =
  process.env.NODE_ENV === "development"
    ? "http://localhost:8888"
    : process.env.BASE_URL;

exports.COOKIE_SECURE = process.env.NODE_ENV !== "development";

exports.ENDPOINT =
  process.env.NODE_ENV === "development" ? "/.netlify/functions" : "/api";

exports.GITHUB_CLIENT_ID = process.env.GITHUB_CLIENT_ID;
exports.GITHUB_CLIENT_SECRET = process.env.GITHUB_CLIENT_SECRET;

exports.SECRET = process.env.SECRET || "SUPERSECRET";
Clean Netlify Function URLs
By default, you can reach your function endpoints via URLs like /.netlify/functions/FILE_NAME. But luckily we can use URL rewriting to change the URL of our function endpoints.
[build]
  command = "npm run build"
  functions = "lambda"
  publish = "dist"

[[redirects]]
  from = "/api/*"
  to = "/.netlify/functions/:splat"
  status = 200
Above you can see the contents of our netlify.toml configuration file in the root directory of our project. The redirects entry tells Netlify to rewrite all requests from /api/* to the original /.netlify/functions/* URL. By specifying the status code 200 we make sure the URL is rewritten not redirected.
What cost me a lot of time was to figure out that due to a bug in the Netlify CLI, query parameters for rewritten URLs are ignored in the local development environment. For this reason and because GitHub sends important data via a query parameter, I couldn’t get the authentication process running at first. As you can see in the configuration file lambda/utils/config.js above, we will later change the base URL and the API endpoint based on the environment to avoid using the rewritten URL during development in order to circumvent this problem.
Using Express with Netlify Functions
Passport is an Express middleware, so if we want to use it, we need to make our AWS Lambda-based serverless functions compatible with Express.
npm install express serverless-httpLuckily there is a npm package that got us covered. serverless-http makes it possible to use Express with serverless functions. We’ll see how in the following chapters.
Authentication with Passport and GitHub OAuth
Next we want to implement the core logic of our authentication flow.
npm install cookie-parser passport passport-github2 passport-jwt jsonwebtokenAfter installing all the dependencies we need, we can finally write some real code.
// lambda/utils/auth.js
const { sign } = require("jsonwebtoken");
const { Strategy: GitHubStrategy } = require("passport-github2");
const passport = require("passport");
const passportJwt = require("passport-jwt");

const {
  BASE_URL,
  ENDPOINT,
  GITHUB_CLIENT_ID,
  GITHUB_CLIENT_SECRET,
  SECRET,
} = require("./config");

function authJwt(email) {
  return sign({ user: { email } }, SECRET);
}

passport.use(
  new GitHubStrategy(
    {
      clientID: GITHUB_CLIENT_ID,
      clientSecret: GITHUB_CLIENT_SECRET,
      callbackURL: `${BASE_URL}${ENDPOINT}/auth/github/callback`,
      scope: ["user:email"],
    },
    async (accessToken, refreshToken, profile, done) => {
      try {
        const email = profile.emails[0].value;
        // Here you'd typically create a new or load an existing user and
        // store the bare necessary informations about the user in the JWT.
        const jwt = authJwt(email);

        return done(null, { email, jwt });
      } catch (error) {
        return done(error);
      }
    },
  ),
);

passport.use(
  new passportJwt.Strategy(
    {
      jwtFromRequest(req) {
        if (!req.cookies) throw new Error("Missing cookie-parser middleware");
        return req.cookies.jwt;
      },
      secretOrKey: SECRET,
    },
    async ({ user: { email } }, done) => {
      try {
        // Here you'd typically load an existing user
        // and use the data to create the JWT.
        const jwt = authJwt(email);

        return done(null, { email, jwt });
      } catch (error) {
        return done(error);
      }
    },
  ),
);
Above you can see how to configure and initialize Passport with the GitHub authentication strategy. Now we’re ready to use the Passport middleware for our serverless authentication endpoint.
Do you want to learn about advanced Vue.js techniques?
Register for the Newsletter of my upcoming book: Advanced Vue.js Application Architecture.
// lambda/auth.js
const bodyParser = require("body-parser");
const cookieParser = require("cookie-parser");
const express = require("express");
const passport = require("passport");
const serverless = require("serverless-http");

require("./utils/auth");

const { COOKIE_SECURE, ENDPOINT } = require("./utils/config");

const app = express();

app.use(bodyParser.urlencoded({ extended: true }));
app.use(bodyParser.json());
app.use(cookieParser());
app.use(passport.initialize());

const handleCallback = () => (req, res) => {
  res
    .cookie("jwt", req.user.jwt, { httpOnly: true, COOKIE_SECURE })
    .redirect("/");
};

app.get(
  `${ENDPOINT}/auth/github`,
  passport.authenticate("github", { session: false }),
);
app.get(
  `${ENDPOINT}/auth/github/callback`,
  passport.authenticate("github", { failureRedirect: "/", session: false }),
  handleCallback(),
);

app.get(
  `${ENDPOINT}/auth/status`,
  passport.authenticate("jwt", { session: false }),
  (req, res) => res.json({ email: req.user.email }),
);

module.exports.handler = serverless(app);
This is all the code necessary for our authentication endpoint to work. Above you can see how to use the serverless-http package to boot up an Express app whenever the auth endpoint is called. Note that this can noticeably slow down our serverless endpoint, as Express has a wide range of features that mostly cause overhead for our application.
If you now run npm run serve and then open https://localhost:8888/.netlify/functions/auth/github with your browser, you will be forwarded to GitHub for authentication. Next you will be redirected to your application at /.netlify/functions/auth/github/callback. As you can see in the handleCallback() method in the code snippet above, this sets a new jwt cookie and redirects you back to the homepage of your app. Congratulations, you are now authenticated!
The /.netlify/functions/auth/status endpoint demonstrates how you can check if a user is authenticated or not. Typically you’d load a user from a database or another API endpoint based on the informations in the JWT.
Wrapping it up
Although using this approach may not be the most performant, since we rely on Express to handle requests to our app, it is definitely a fairly convenient way to perform authentication in a serverless context. Thanks to Netlify Functions and Passport, we can roll our own authentication flow in about an hour instead of a few days.