Implementing a GDPR Consent Workflow with Vue.js
Love it or hate it, GDPR compliance is now a requirement if you want to collect data from EU citizens. Today we take a look at how we can use the concept of renderless components to implement a basic GDPR consent workflow.
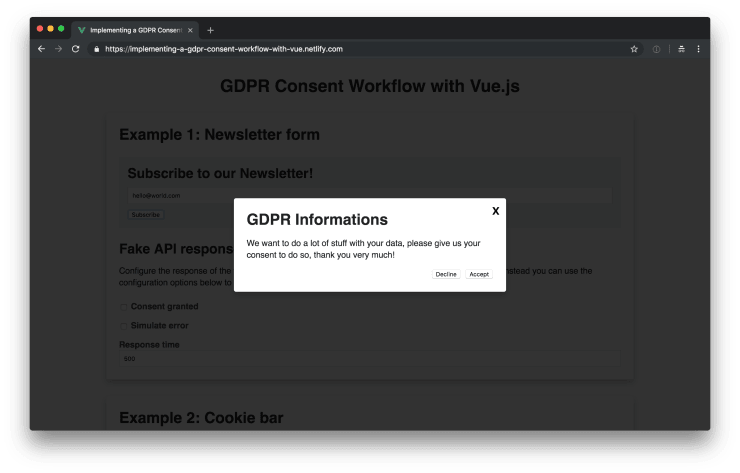
GDPR modal form built with Vue.js
Additionally to the concept of renderless components, we use Portal Vue to display a modal dialog.
If you’re curious about the final result, you can take a look at the full code at GitHub or a demo application hosted on Netlify.
Check and require consent for a newsletter form
In our first example, we want to ask the users for their consent to allow us to send them newsletters. Let’s start with building the newsletter form component and enhance it with the possibility to ask for the users consent later.
<template>
  <div class="o-vertical-spacing">
    <template v-if="subscribed">
      <p class="success">Thank you for subscribing!</p>
    </template>
    <template v-else>
      <h3>Subscribe to our Newsletter!</h3>
      <input type="email" />
      <button @click="subscribe">Subscribe</button>
    </template>
  </div>
</template>

<script>
export default {
  name: "NewsletterForm",
  data() {
    return {
      subscribed: false,
    };
  },
  methods: {
    subscribe() {
      // In a real application, you'd most
      // likely trigger an API request here.
      this.subscribed = true;
    },
  },
};
</script>
The example code, taken from the NewsletterForm.vue component in src/components, you can see above, is pretty straightforward: if the user is not subscribed yet, we render an <input> field and ask them to subscribe. If the user subscribes, a thank you message is rendered instead.
Asking for the users consent
Now that we’ve built a simple newsletter form, we can add the functionality to ask the users for their consent. Your first instinct might be to add some logic directly in the newsletter component to do this but such a solution would not be very reusable.
Renderless components are a perfect solution for problems like this. So let’s build a renderless GDPR consent component.
// src/components/GdprConsentFrame.js
export default {
  props: {
    provider: {
      type: Object,
    },
  },
  data() {
    return {
      error: null,
      loading: false,
    };
  },
  methods: {
    async checkConsent() {
      try {
        this.setLoadingState();
        const consentGranted = await this.provider.checkConsent();

        if (consentGranted) {
          // If a consent was found, we emit
          // the corresponding event.
          this.$emit("consent-granted");
        } else {
          // If no consent was found, we wan't
          // to ask the user for their consent.
          this.$emit("request-consent");
        }
        // Reset the loading state after everything is done.
        this.loading = false;
      } catch (error) {
        this.setErrorState(error);
      }
    },
    async denyConsent() {
      // We don't want to persist the information if a user
      // hasn't given their consent, so we emit the event
      // to signal that the user has denied their consent.
      this.$emit("consent-denied");
    },
    async grantConsent() {
      try {
        this.setLoadingState();
        const consentGranted = await this.provider.grantConsent();

        if (consentGranted) {
          this.$emit("consent-granted");
        }
        // Reset the loading state after everything is done.
        this.loading = false;
      } catch (error) {
        this.setErrorState(error);
      }
    },
    setErrorState(error) {
      this.error = error;
      this.loading = false;
    },
    setLoadingState() {
      this.error = null;
      this.loading = true;
    },
  },
  render() {
    return this.$scopedSlots.default({
      // Data
      error: this.error,
      loading: this.loading,
      // Methods
      checkConsent: this.checkConsent,
      denyConsent: this.denyConsent,
      grantConsent: this.grantConsent,
    });
  },
};
The code for the renderless component, you can see above, is slightly more complex. I’ve tried my best to add comments to explain the code. But I think everything becomes easier to understand as soon as we’re using the GdprConsentFrame component inside of our NewsletterForm component.
The API provider
In the GdprConsentFrame component, we use methods on the provider property to check, deny and grant consents for us. By passing the provider as a property, we’re able to use different providers for certain situations. In our case we want to use an API to persist and check consents for us. But in the next example, we’ll see how we can use the same GdprConsentFrame to handle the logic for a cookie bar by passing it a cookie provider.
// src/providers/gdpr-api-provider.js
import gdprApi from "../services/gdpr-api";

export default {
  checkConsent() {
    return gdprApi.checkConsent();
  },
  grantConsent() {
    return gdprApi.grantConsent();
  },
};
Above you can see the code for our API provider. The gdprApi service would be the place where you use XHR, fetch or a package like axios to make calls to your GDPR API backend. In our case, gdprApi is a naive fake implementation of an API which should be sufficient for demo purposes.
The consent modal dialog
The most convenient way of showing users a GDPR consent information form is to use a modal dialog. We’ll use Portal Vue to render a GdprConsentModal component which asks the user for their consent.
<template>
  <app-modal
    @accept="$emit('grant-consent')"
    @close="$emit('deny-consent')"
    @decline="$emit('deny-consent')"
  >
    <div class="o-content">
      <h2>GDPR Information</h2>
      <p>
        We want to do a lot of stuff with your data, please give us your consent
        to do so, thank you very much!
      </p>
    </div>
  </app-modal>
</template>

<script>
import AppModal from "./AppModal.vue";

export default {
  name: "GdprConsentModal",
  components: {
    AppModal,
  },
};
</script>
As you can see in the code snippet above, this is a very simple implementation of a GDPR consent form but it should be enough to give you an idea of how this could be enhanced for a real world solution.
The AppModal component which we’re using as a wrapper, is a very, very naive implementation of a modal dialog. You should absolutely use something more sophisticated in your own application. This implementation is not accessible at all!
<template>
  <portal to="modal">
    <div class="AppModal">
      <div class="AppModal__inner">
        <button class="AppModal__close" @click="$emit('close')">X</button>

        <slot />

        <div class="AppModal__actions">
          <button @click="$emit('decline')">Decline</button>
          <button @click="$emit('accept')">Accept</button>
        </div>
      </div>
    </div>
  </portal>
</template>

<script>
// Naive, not accesible (!) modal implementation.
// Don't use this in production!
export default {
  name: "AppModal",
};
</script>
I can’t stress this enough: this is a very simple implementation for demonstration purposes, if you implement this yourself, keep accessibility in mind.
Put it all together
Now we’ve set up all the parts we need and we’re ready to put everything together to make our simple newsletter form component, we’ve created at the beginning of this article, GDPR compliant.
 <template>
-  <div class="o-vertical-spacing">
+  <gdpr-consent-frame
+    :provider="gdprApiProvider"
+    @request-consent="showConsentModal = true"
+    @consent-denied="showConsentModal = false"
+    @consent-granted="subscribe"
+  >
+    <div
+      slot-scope="{
+        checkConsent,
+        denyConsent,
+        error,
+        grantConsent,
+        loading,
+      }"
+      class="o-vertical-spacing"
+    >
       <template v-if="subscribed">
         <p class="success">
           Thank you for subscribing!
         </p>
       </template>
       <template v-else>
         <h3>Subscribe to our Newsletter!</h3>
         <input type="email">
-      <button @click="subscribe">
-        Subscribe
+        <button @click="checkConsent">
+          {{ loading ? 'Loading ...' : 'Subscribe' }}
         </button>
+        <p
+          v-if="error"
+          class="error"
+        >
+          There was an error, please try again!
+        </p>
       </template>
+
+      <gdpr-consent-modal
+        v-if="showConsentModal"
+        @deny-consent="denyConsent"
+        @grant-consent="grantConsent"
+      />
     </div>
+  </gdpr-consent-frame>
 </template>

 <script>
+import gdprApiProvider from '../providers/gdpr-api-provider';
+
+import GdprConsentFrame from './GdprConsentFrame';
+import GdprConsentModal from './GdprConsentModal.vue';
+
 export default {
   name: 'NewsletterForm',
+  components: {
+    GdprConsentFrame,
+    GdprConsentModal,
+  },
   data() {
     return {
+      showConsentModal: false,
       subscribed: false,
     };
   },
+  created() {
+    this.gdprApiProvider = gdprApiProvider;
+  },
   methods: {
     subscribe() {
+      // We hide the modal because the user must
+      // have given their consent at this point.
+      this.showConsentModal = false;
       // In a real application, you'd most
       // likely trigger an API request here.
       this.subscribed = true;
Above you can see that we’re now using the GdprConsentFrame component as a wrapper around our NewsletterForm component which we’ve created earlier. Via the slot-scope property, we have access to the data and methods provided by the GdprConsentFrame. To update the state of the NewsletterForm component, we react to certain events emitted by the wrapper component. Most importantly, we listen to a consent-granted event on which we subscribe the user to our newsletter.
Check and require consent to save cookies
Because we’ve implemented our GdprConsentFrame in a way that it consumes a provider instead of directly accessing the API, we’re now able to reuse the component, to build a simple cookie bar component.
But there is still one minor thing we must add to our GdprConsentFrame component to make it possible to power a cookie bar.
 export default {
   props: {
+    immediate: {
+      default: false,
+      type: Boolean,
+    },
     provider: {
       type: Object,
     },
   },
   data() {
     return {
       error: null,
       loading: false,
     };
   },
+  created() {
+    if (this.immediate) this.checkConsent();
+  },
   methods: {
     async checkConsent() {
       try {
By adding a new immediate property and checking the consent status immediately if it is set, we make it easier to show the cookie bar as soon as the page is loaded.
The cookie bar component
Now let’s implement a very simple cookie bar which is reusing the GdprConsentFrame component.
<template>
  <gdpr-consent-frame
    :provider="gdprCookieProvider"
    immediate
    @request-consent="visible = true"
    @consent-granted="visible = false"
  >
    <div
      v-if="visible"
      slot-scope="{ error, grantConsent, loading }"
      class="CookieBar"
    >
      <p>Please give us your consent to use cookies, thanks!</p>
      <button @click="grantConsent">
        {{ loading ? "Loading ..." : "Accept" }}
      </button>
      <p v-if="error" class="error">There was an error, please try again!</p>
    </div>
  </gdpr-consent-frame>
</template>

<script>
import gdprCookieProvider from "../providers/gdpr-cookie-provider";

import GdprConsentFrame from "./GdprConsentFrame";

export default {
  name: "CookieBar",
  components: {
    GdprConsentFrame,
  },
  data() {
    return {
      visible: false,
    };
  },
  created() {
    this.gdprCookieProvider = gdprCookieProvider;
  },
};
</script>
In the code snippet above, you can see that we use the immediate property on the GdprConsentFrame component to trigger a consent check as soon as the component is initialized. If the user has not given their consent yet, the request-consent event is triggered and we update the visible property to render the cookie bar component. As soon as the user has given their consent, the cookie bar is hidden.
In the following code snippet, you can see the cookie provider which we’re using to persist and retrieve the cookie bar consent status.
import Cookies from "js-cookie";

const COOKIE_NAME = "eu_cookie";

export default {
  checkConsent() {
    return Cookies.get(COOKIE_NAME);
  },
  grantConsent() {
    Cookies.set(COOKIE_NAME, true, { expires: 30 });

    return true;
  },
};Wrapping it up
The concept of renderless components is a very powerful one. As we’ve seen with this example, we can build flexible and reusable components that way. By simply using a different provider, we’re able to use the same logic for handling the GDPR consent for a newsletter, for a EU cookie bar.
GDPR compliance might be a PITA, but we can do ourself a favor by implementing it in a generic way, which we can reuse across our application.