How to Use GraphQL with Vue Apollo Components and Netlify Functions
Although I’ve already experimented a little bit with GraphQL, especially how to integrate GraphQL in a Vuex powered application, I never took the time to delve into the details.
In today’s article we’ll build a simple example application using Apollo Components which basically are renderless components (although they do render a wrapper <div>) for querying a GraphQL backend. Furthermore we’ll set up Netlify Functions to run our GraphQL endpoint.
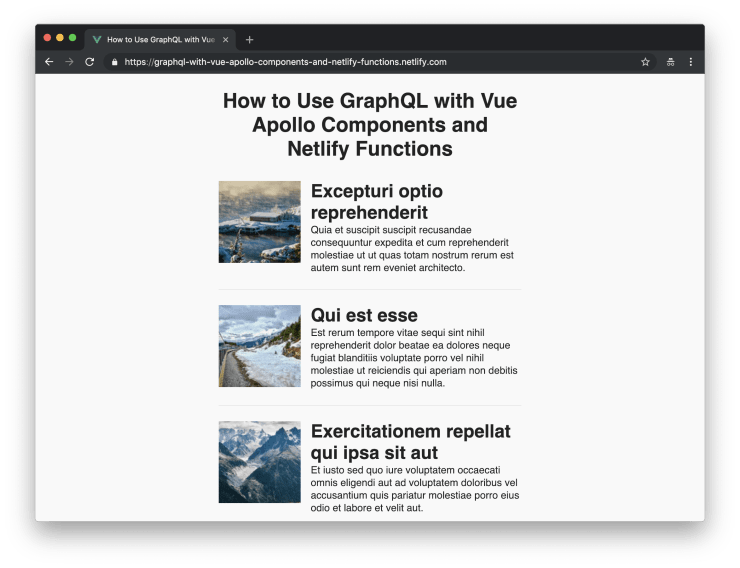
The final result: rendering news articles fetched from a GraphQL endpoint
You can check out the code of the example application on GitHub and you can see the final result on Netlify.
Installation
After setting up a new Vue.js Project with Vue CLI 3 we can simply install vue-apollo as a Vue CLI plugin.
vue add apolloAnswer the questions in the following way.
? Add example code No
? Add a GraphQL API Server? No
This helps us get going. But we have to make some changes to the boilerplate code in src/vue-apollo.js which was automatically generated for us. Because we use Netlify Functions we can’t use WebSockets and we also have to change the API URL.
-import { createApolloClient, restartWebsockets } from 'vue-cli-plugin-apollo/graphql-client';
+import { createApolloClient } from 'vue-cli-plugin-apollo/graphql-client';
 import Vue from 'vue';
 import VueApollo from 'vue-apollo';

 Vue.use(VueApollo);

 const AUTH_TOKEN = 'apollo-token';

-const httpEndpoint = process.env.VUE_APP_GRAPHQL_HTTP || 'http://localhost:4000/graphql';
+const httpEndpoint = process.env.VUE_APP_GRAPHQL_HTTP || '/.netlify/functions/graphql';
 const defaultOptions = {
   httpEndpoint,
-  wsEndpoint: process.env.VUE_APP_GRAPHQL_WS || 'ws://localhost:4000/graphql',
   tokenName: AUTH_TOKEN,
   persisting: false,
   websocketsOnly: false,
   ssr: false,
 };

 export function createProvider(options = {}) {
-  const { apolloClient, wsClient } = createApolloClient({
+  const { apolloClient } = createApolloClient({
     ...defaultOptions,
     ...options,
   });
-  apolloClient.wsClient = wsClient;

   const apolloProvider = new VueApollo({
     defaultClient: apolloClient,
     defaultOptions: {
       $query: {},
     },
     errorHandler(error) {
       console.log('%cError', 'background: red; color: white; padding: 2px 4px; border-radius: 3px; font-weight: bold;', error.message);
     },
   });

   return apolloProvider;
 }

 export async function onLogin(apolloClient, token) {
   if (typeof localStorage !== 'undefined' && token) {
     localStorage.setItem(AUTH_TOKEN, token);
   }
-  if (apolloClient.wsClient) restartWebsockets(apolloClient.wsClient);
   try {
     await apolloClient.resetStore();
   } catch (e) {
     console.log('%cError on cache reset (login)', 'color: orange;', e.message);
   }
 }

 export async function onLogout(apolloClient) {
   if (typeof localStorage !== 'undefined') {
     localStorage.removeItem(AUTH_TOKEN);
   }
-  if (apolloClient.wsClient) restartWebsockets(apolloClient.wsClient);
   try {
     await apolloClient.resetStore();
   } catch (e) {
     console.log('%cError on cache reset (logout)', 'color: orange;', e.message);
   }
 }
Netlify Functions
Netlify Functions make it possible to run a GraphQL endpoint using Serverless technology. Let’s take a look at how we can update our project to make use of Netlify Functions.
Netlify provides us with a tool for running Lambda Functions locally: netlify-lambda.
npm install netlify-lambdaNext we have to add a netlify.toml configuration file to the root directory of our application.
[build]
  # This will be your default build command.
  command = "npm run build"
  # This is where Netlify will look for your lambda functions.
  functions = "functions"
  # This is the directory that you are publishing from.
  publish = "dist"
Because we’ll use a build step to create our Lambda Functions, we don’t want to commit our functions directory to Git. Let’s add it to our .gitignore file in order to prevent it ending up in our Git repository.
 # Folders to ignore
 dist
+/functions
 node_modules
The netlify-lambda package makes it possible to run netlify-lambda serve src-functions in a npm script to serve functions located in the src-functions directory locally under http://localhost:9000. This is fine for testing the Lambda Functions standalone but we want to access the endpoints, provided by our Lambda Functions, from our Vue.js application. To make this possible, we can configure webpack to proxy localhost:9000 and make our endpoints available under the URL of our webpack dev server (e.g. http://localhost:8080/.netlify/functions/FUNCTION_NAME) similar to how the functions are served on Netlify (e.g. https://yourdomain.com/.netlify/functions/FUNCTION_NAME).
Luckily, the default Vue CLI setup already includes all the tools necessary for proxying requests. In order to do so, we simply have to update our vue.config.js file.
 module.exports = {
+  devServer: {
+    proxy: {
+      '/.netlify': {
+        target: 'http://localhost:9000',
+        pathRewrite: { '^/.netlify/functions': '' },
+      },
+    },
+  },
   lintOnSave: false,
 };
To make it easier to start the development server and to build everything we need for production, we can update our serve and build scripts in the package.json file.
   "license": "MIT",
   "private": true,
   "scripts": {
-    "serve": "vue-cli-service serve",
+    "serve": "netlify-lambda serve src-functions & vue-cli-service serve",
-    "build": "vue-cli-service build",
+    "build": "netlify-lambda build src-functions && vue-cli-service build",
     "lint": "vue-cli-service lint"
   },
   "dependencies": {
Do you want to learn more about advanced Vue.js techniques?
Register for the Newsletter of my upcoming book: Advanced Vue.js Application Architecture.
Building a simple example application
Now that we’ve set up our build process, let’s build a simple example application. Our application should fetch a bunch of news articles and render all of them as an unordered list.
The GraphQL backend
Before we can render anything though, we need a GraphQL endpoint which returns the data we need. In our case we want to return a list of news articles.
We’ll use the apollo-server-lambda package to create a GraphQL endpoint which runs as a Serverless Function on Netlify.
npm install apollo-server-lambda graphql// src-functions/graphql.js
import { ApolloServer, gql } from "apollo-server-lambda";
// In a real world application this would be
// replaced with a database or a REST API query.
import articles from "../data/articles.json";
const typeDefs = gql`
type Article {
body: String
id: Int
image: String
title: String
}
type Query {
articles: [Article]
}
`;
const resolvers = {
Query: {
articles: () => articles,
},
};
const server = new ApolloServer({
typeDefs,
resolvers,
});
exports.handler = server.createHandler();In the example above you can see how to create the GraphQL type definitions and resolvers for our articles endpoint. The articles.json file is used as our datasource in order to keep things simple. In a real world application you’ll either get the data from a database or some other API. You can take a look at the file at GitHub.
The Vue.js application
Now we can query our GraphQL endpoint to fetch the data we need inside of our Vue.js application.
<template>
  <div
    class="App o-container o-container--s o-vertical-spacing o-vertical-spacing--xl"
  >
    <h1>How to Use GraphQL with Vue Apollo Components and Netlify Functions</h1>
    <ApolloQuery :query="require('./queries/articles.gql')">
      <template slot-scope="{ result: { loading, error, data } }">
        <div v-if="loading">Loading...</div>
        <div v-else-if="error">An error occured! Please try again.</div>
        <ul v-else-if="data" class="App__article-list">
          <li
            v-for="article in data.articles"
            :key="article.id"
            class="App__article-list-item"
          >
            <div class="App__article-list-figure">
              <img :src="article.image" alt="" />
            </div>
            <div class="App__article-list-body">
              <h2>{{ article.title }}</h2>
              <p>{{ article.body }}</p>
            </div>
          </li>
        </ul>
        <div v-else>There are no articles yet. Please come back later.</div>
      </template>
    </ApolloQuery>
  </div>
</template>

<script>
export default {
  name: "App",
};
</script>

<style lang="scss">
@import "./assets/scss/settings/**/*";
@import "./assets/scss/generic/**/*";
@import "{
  .o-container,
  .o-container--s,
} from ~@avalanche/object-container";
@import "{
  .o-vertical-spacing,
  .o-vertical-spacing--xl,
} from ~@avalanche/object-vertical-spacing";

.App {
  padding-top: setting-spacing(xl);
  padding-bottom: setting-spacing(xl);

  h1 {
    text-align: center;
  }
}

.App__article-list-item {
  display: flex;

  &:not(:first-child) {
    margin-top: setting-spacing(l);
    padding-top: setting-spacing(l);
    border-top: 1px solid #e2e2e2;
  }
}

.App__article-list-body {
  margin-left: setting-spacing(m);
}
</style>
I hope the above example makes it clear how awesome Apollo Components are. As you can see in the <template> section of the code snippet the ApolloQuery component provides us with a loading and an error state which makes it straightforward to render a loading spinner while fetching data or an error message if something unexpected happens.
Next you can see the src/queries/articles.gql file which we use in our App component in order to fetch all the data we need to render the list of articles.
{
  articles {
    body
    id
    image
    title
  }
}Wrapping it up
Netlify Functions make it really easy to deploy a full blown application containing the frontend as well as all the backend logic. But we have to keep in mind that because of the short lived nature of Serverless Functions, it is not possible to set up WebSockets which makes it impossible to use some of the more advanced features GraphQL has to offer.