Creating PDF Invoices with Airtable, Vue.js and Puppeteer
I recently started freelancing. After doing my thing, building great web stuff (of course), there also is much extra work that I am not so experienced with: time tracking, bookkeeping, and accounting, to name a few. Recently I had to send my first invoice, and because the invoice has to not only list all the line items in a boring way, but also look on point, my business partner, who is a great designer, decided to do it in InDesign. Although the resulting invoice does, indeed, look great, it is not the most efficient and scaleable way to do things.
After doing some research on which tools are available out there for creating invoices, I quickly realized that none of them allow for the level of customization we wanted. None of them, but Airtable (this is an affiliate link, this is not). Airtable is a database on steroids with a beautiful UI on top of it. It also makes it very easy to query all the data you enter via a straightforward API.

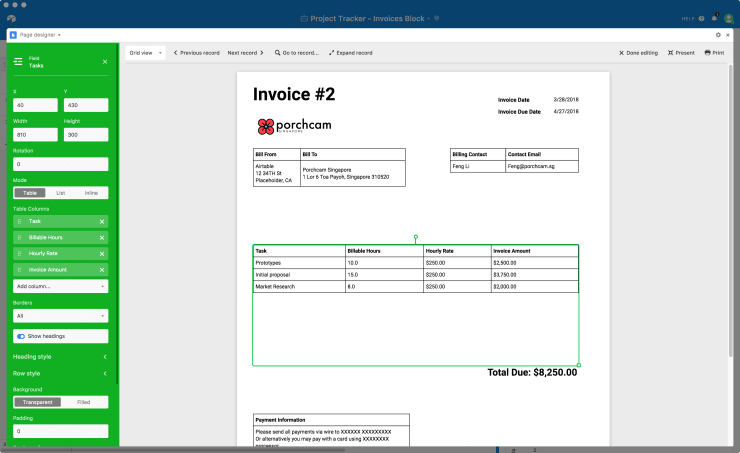
A list of invoices in Airtable
Client management with Airtable
Although we’re using a different tool for project management, I’m planning on using Airtable for client management. I basically followed this official guide by Airtable on how to set up a client management base. So I don’t want to go into much detail on how to set up Airtable, please read the official documentation if you need more information about this topic.
Creating PDFs with Airtable
As you can see in the article I’ve linked above, you can also create PDFs directly in Airtable itself (it is amazing how powerful Airtable is). Although this is great for simple invoices, it lacks the flexibility to fully customize every pixel of the invoice design. If you’re happy with a not-so-fancy, basic design, I recommend you to follow the official article and call it a day. But if you, like my business partner and I, want to have full control over the design of your invoices, read on.
Querying Airtable with Vue.js
After setting up Airtable we can create a fresh API token which makes it possible to access the data via a very powerful API. Next we can set up a new Vue.js project using the Vue CLI. I won’t go into much detail about the set up process. If you want to save time, you can check out the GitHub repository for this article.
Now that we’ve initialized a basic Vue.js project, we can add the functionality to make queries to the Airtable API.
npm install --save airtableAfter installing the airtable npm package, we can use it to query the Airtable API.
// src/utils/airtable.js
import Airtable from "airtable";

// WARNING: This API key gives full access
// to your Airtable account!
// Do not expose this to the public! Don't
// use this API key in a public facing
// client-side application!
const API_KEY = "key123xxx123yyy11";
const BASE_ID = "appX14nhkIr0iPp5M";

export default new Airtable({ apiKey: API_KEY }).base(BASE_ID);
In order to add a layer of abstraction, we use service functions as a wrapper around the Airtable API to fetch the data we need. This makes it easier to switch to a different service in the future, if, for example, we’re not happy with Airtable in the long run.
// src/services/invoice.js
import airtableBase from "../utils/airtable";

const TABLE = "Invoices";

export async function findByInvoiceId(id) {
  const result = await airtableBase(TABLE)
    .select({
      filterByFormula: `{Invoice ID} = '${id}'`,
    })
    .all();

  return result[0];
}
// src/services/client.js
import airtableBase from "../utils/airtable";
const TABLE = "Clients";
export function find(id) {
return airtableBase(TABLE).find(id);
}// src/services/task.js
import airtableBase from "../utils/airtable";
const TABLE = "Tasks";
export function find(id) {
return airtableBase(TABLE).find(id);
}Above you can see the services we’ll use to query the Airtable API for invoices, clients and tasks.
Do you want to learn more about advanced Vue.js techniques?
Register for the Newsletter of my upcoming book: Advanced Vue.js Application Architecture.
Rendering the invoice with Vue.js
Next up, we can use the services, to fetch all the data we need for our Vue.js application to render an invoice. Below you can see the contents of the src/App.vue file of our application which is doing all the magic. You might want to split this up into multiple components, I decided against it because I feel it’s not large enough yet to sacrifice the convenience of having everything in one place for a clean and tidy application structure.
<template>
  <div class="App">
    <header class="App__header">
      <address>
        <strong>{{ client.Name }}</strong
        ><br />
        {{ client["Contact Person"] }}<br />
        {{ client.Street }}<br />
        {{ client.Zip }} {{ client.Town }}
      </address>

      <address class="App__personal-address">
        Markus Oberlehner | Main Street 10, 1234 Nice Town | +43 670 206 3117 |
        markus.oberlehner@gmail.com
      </address>
    </header>

    <main class="App__main">
      <div class="App__town-and-date">Nice Town, {{ invoice.Date }}</div>

      <h1 class="App__headline">Invoice Nr. {{ invoice["Invoice ID"] }}</h1>

      <div class="App__tasks tasks">
        <div class="tasks__row tasks__row--head">
          <div class="tasks__column tasks__column--task">Task</div>
          <div class="tasks__column tasks__column--number tasks__column--rate">
            Rate
          </div>
          <div class="tasks__column tasks__column--number tasks__column--hours">
            Hours
          </div>
          <div class="tasks__column tasks__column--number tasks__column--total">
            Total
          </div>
        </div>
        <div v-for="task in tasks" :key="task.Name" class="task tasks__row">
          <div class="tasks__column tasks__column--task">
            <h2 class="task__headline">{{ task.Name }}</h2>
            <p class="task__body">{{ task.Description }}</p>
          </div>
          <div class="tasks__column tasks__column--number tasks__column--rate">
            € {{ task["Hourly Rate"][0] }}
          </div>
          <div class="tasks__column tasks__column--number tasks__column--hours">
            {{ task["Billable Hours"] }}
          </div>
          <div class="tasks__column tasks__column--number tasks__column--total">
            € {{ task.Cost }}
          </div>
        </div>
        <div class="tasks__row tasks__row--foot">
          <div class="tasks__column tasks__column--number">
            <strong>Total € {{ invoice.Total }}</strong>
          </div>
        </div>
      </div>
    </main>

    <footer class="App__footer">
      Best Regards<br />
      Markus Oberlehner
    </footer>

    <div v-if="loaded" id="loaded" />
  </div>
</template>

<script>
import { find as findClient } from "./services/client";
import { find as findTask } from "./services/task";
import { findByInvoiceId as findInvoiceByInvoiceId } from "./services/invoice";

export default {
  name: "App",
  data() {
    return {
      client: {},
      invoice: {},
      loaded: false,
      tasks: [],
    };
  },
  created() {
    this.fetchInvoiceData();
  },
  methods: {
    async fetchInvoiceData() {
      // Get the invoice ID from the URL.
      const url = new URL(window.location.href);
      const invoiceId = url.searchParams.get("invoiceId");

      const invoice = await findInvoiceByInvoiceId(invoiceId);
      this.invoice = invoice.fields;

      const [client, tasks] = await Promise.all([
        findClient(this.invoice.Client[0]),
        Promise.all(invoice.fields.Tasks.map((id) => findTask(id))),
      ]);

      this.client = client.fields;
      this.tasks = tasks.map((x) => x.fields);
      this.loaded = true;
    },
  },
};
</script>

<style lang="scss">
@import "./assets/scss/settings/**/*";
@import "./assets/scss/generic/**/*";

$vertical-page-spacing: 1.5cm;
$horizontal-page-spacing: 2cm;
$theme-color: #00acc1;
$theme-contrast-color: #fff;

@page {
  margin: $vertical-page-spacing 0;
}

@page :first {
  margin: 0 0 $vertical-page-spacing 0;
}

.App__header {
  padding: setting-spacing(xxl) $horizontal-page-spacing setting-spacing(xl);
  background-color: $theme-color;
  color: $theme-contrast-color;
}

.App__personal-address {
  margin-top: setting-spacing(xl);
}

.App__main {
  padding: setting-spacing(xxxl) $horizontal-page-spacing;
}

.App__town-and-date {
  text-align: right;
}

.App__headline {
  margin-top: setting-spacing(xl, true);
  font-size: 2.5em;
  font-weight: 700;
}

.App__tasks {
  margin-top: setting-spacing(xxl);
}

.App__footer {
  padding-right: $horizontal-page-spacing;
  padding-left: $horizontal-page-spacing;
}

.tasks__row {
  display: flex;
  page-break-inside: avoid;

  &:not(:first-child) {
    margin-top: setting-spacing(l);
  }
}

.tasks__row--head {
  padding-bottom: setting-spacing(s);
  color: #666;
  border-bottom: 2px solid #efefef;
}

.tasks__row--foot {
  padding-top: setting-spacing(s);
  border-top: 2px solid #efefef;
}

.tasks__column {
  flex-grow: 1;
}

.tasks__column--task {
  width: 70%;
}

.tasks__column--rate {
  width: 10%;
}

.tasks__column--hours {
  width: 10%;
}

.tasks__column--total {
  width: 10%;
}

.tasks__column--number {
  text-align: right;
}

.task__headline {
  font-weight: 700;
}
</style>
This is a lot of code, let’s take a look at the most important piece of it.
  // ...
  methods: {
    async fetchInvoiceData() {
      // Get the invoice ID from the URL.
      const url = new URL(window.location.href);
      const invoiceId = url.searchParams.get('invoiceId');

      const invoice = await findInvoiceByInvoiceId(invoiceId);
      this.invoice = invoice.fields;

      const [client, tasks] = await Promise.all([
        findClient(this.invoice.Client[0]),
        Promise.all(invoice.fields.Tasks.map(id => findTask(id))),
      ]);

      this.client = client.fields;
      this.tasks = tasks.map(x => x.fields);
      this.loaded = true;
    },
  },
  // ...
The fetchInvoiceData() method gets the invoice ID from the invoiceId URL parameter and immediately fetches the invoice. After fetching the invoice, the corresponding client and tasks are fetched in parallel. As soon as all the data is fetched, the loaded property is set to true in order to render an element with an ID of #loaded. We can use this later to let Puppeteer know that everything is ready to crate the PDF.
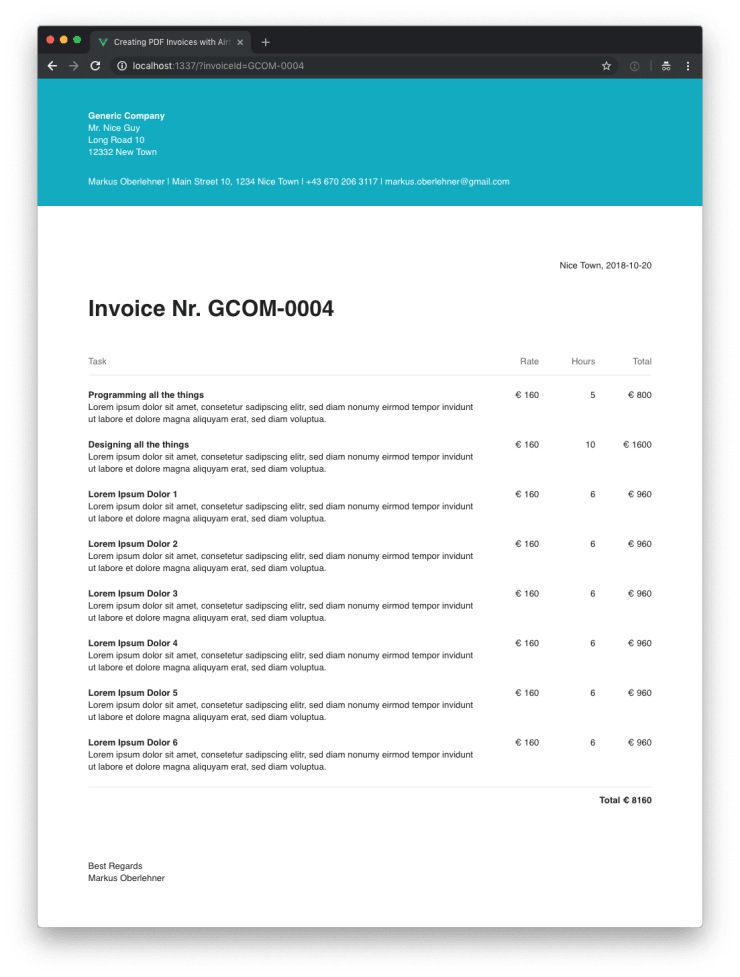
A basic invoice rendered with Vue.js in the browser
Creating a PDF with Puppeteer
Now that our invoice is already rendered correctly in the browser, we can use Puppeteer to create a PDF from it.
npm install --save puppeteerAfter installing the puppeteer npm package, we can use it to build a PDF generation script.
// src/bin/pdf.js
#!/usr/bin/env node
const puppeteer = require('puppeteer');

// Get the invoice ID from the CLI arguments.
const invoiceId = process.argv[2];

(async () => {
  const browser = await puppeteer.launch();
  const page = await browser.newPage();

  await page.goto('http://localhost:1337/?invoiceId=${invoiceId}');
  // Wait for everything to be
  // loaded before creating the PDF.
  await page.waitForSelector('#loaded');
  await page.pdf({
    displayHeaderFooter: true,
    // HTML in the header and footer
    // templates is unstyled by default.
    // You have to use inline styles for
    // styling.
    footerTemplate: `
      <style>
      div {
        width: 100%;
        padding-right: 1.5cm;
        padding-bottom: 0.25cm;
        font-family: Arial;
        font-size: 8pt;
        text-align: right;
        color: #666;
      }
      </style>
      <div>
        Page <span class="pageNumber"></span> / <span class="totalPages"></span>
      </div>
    `,
    headerTemplate: ' ',
    format: 'A4',
    path: `${invoiceId}.pdf`,
    printBackground: true,
  });
  await browser.close();
})();
You can run the script, typing the following command into your CLI of choice.
# Serve the Vue.js application.
npm run serve
# Create a PDF invoice.
node bin/pdf.js YOUR-INVOICE-ID
After a few seconds, you should see a newly created PDF named YOUR-INVOICE-ID.pdf in the projects root directory.
Wrapping it up
When I was still a young and unexperienced programmer, I wanted to build everything myself. I highly overestimated my own capabilities and I highly underestimated the time it takes to build and maintain even a very simple application. Nowadays, I gladly pay for well done third party services, because I know: in the long run, more often than not, I save a lot of money and headaches by doing so.
The approach we took in this article, combines the best of two worlds: we use third party tools for the complex tasks of project and client management, but we also use a custom solution for creating, what is an essential part of the relation with the customer, unique looking invoices.